You're reading for free via Danny Sapio's Friend Link. Become a member to access the best of Medium.
Member-only story
10 Time-Savers that I Use Daily as a UI Designer
My favorite tips, tricks, and shortcuts in UI design

Here 10 of my favorite time-savers that I’d be lost without.
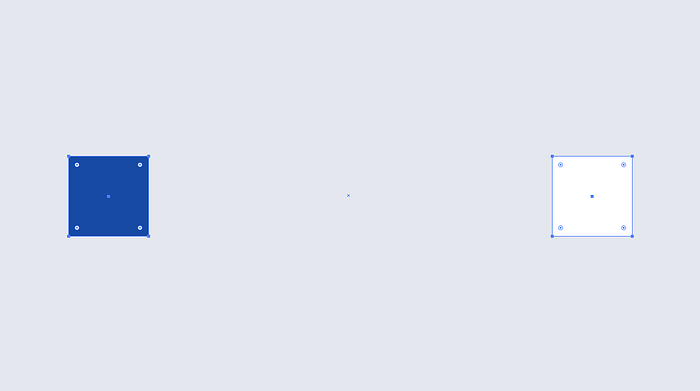
1. Use the scale tool in Sketch to avoid distortion

Have you ever tried to re-size a group in Sketch, and you’re left with a bunch of awkwardly sized items? Text especially has a hard time scaling when you drag the corners to enlarge or shrink.
Well, there’s a simple solution to this annoyance that saves me a ton of time. Once I found the scale option, I no longer would have to go back and re-size each element individually.

To use it, all you have to do is select the item or group you want to resize and click on “Scale” in the header menu or press CMD + K. You can then set the resize percentage or dimensions and boom!
2. Autofill dummy content using Craft
The Craft plugin by Invision for Sketch has a ton of really cool workflow enhancing tools. The main tool that I use, aside from uploading my artboards to Invision, is autofill.
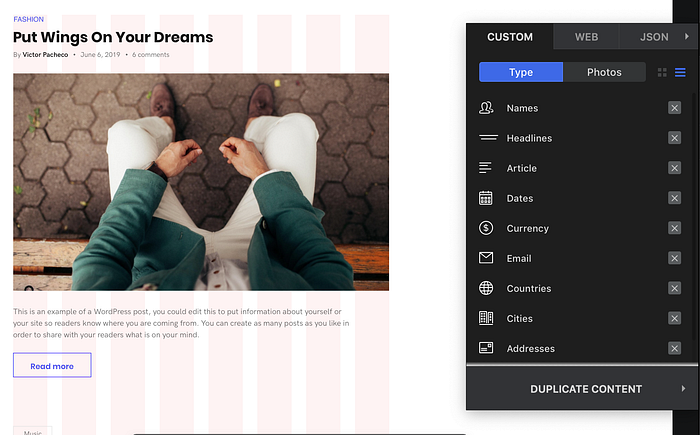
To use it, all you need to do is select images or text in your file and then choose the type of content that you would like added. You can also pull content from a Dropbox folder or any folder on your computer.
This tool is brilliant and saves me from having to add lorem ipsum text or think of fake content to add for apps I’m designing.
3. Instantly generate the perfect color palette in Illustrator
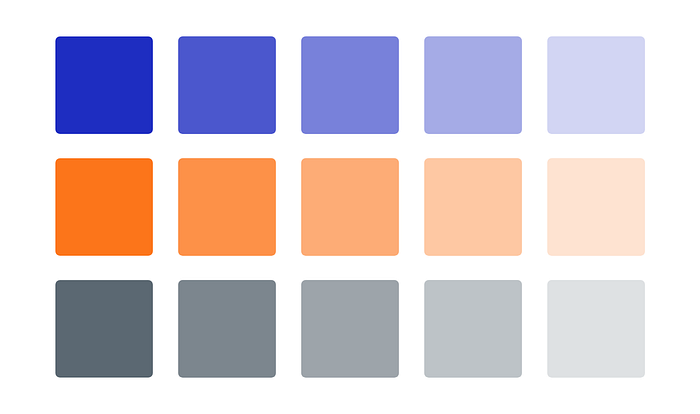
Using Illustrator’s blending tools, it’s simple to create a color palette in seconds. The blend tool removes the guesswork involved in selecting color values for your design palette. Other tools can do this, but this is the quickest method, in my opinion.
Here’s how to do it:
⭡ Step 1: Make two rectangles. Let one be the desired color for your palette and make the other white.
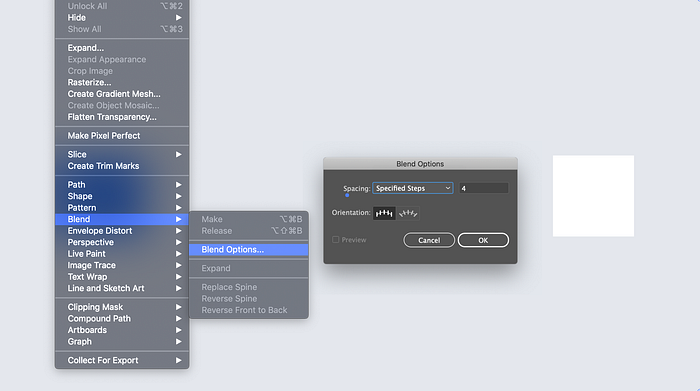
⭡ Step 2: Select both rectangles and open the blend options. Object > Blend > Blend Options. Then set the spacing to “specified steps” and set the amount to the number of color options that you need.
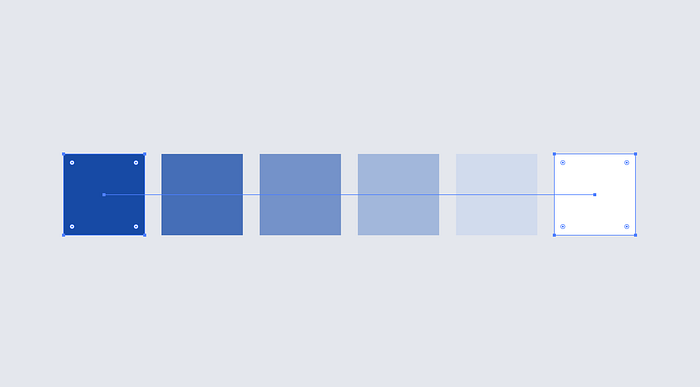
⭡ Step 3: With both rectangles selected go to Object > Blend > Make, or press Option + CMD + B — and voila!
4. Tidy up & Smart alignment

Tidy up is one of my favorite features in Sketch and Figma. If I have a group of items that I need to be aligned in a list or a grid, I can select them and then click the blue tidy up icon in the corner. In Sketch, click “Tidy” in the top right corner. I can then hold shift and drag the padding between elements to my desired amount.
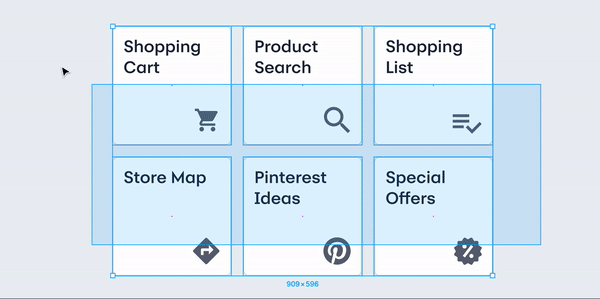
The smart layout in Sketch & Figma is another great feature. If I have a grid of items, I can quickly swap the location of objects by clicking the circle in the middle and dragging that item to its new spot. It’s that simple!
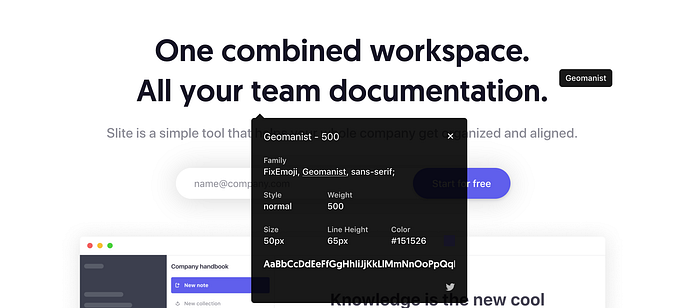
5. Avoid ruining the layout of designs with ellipses
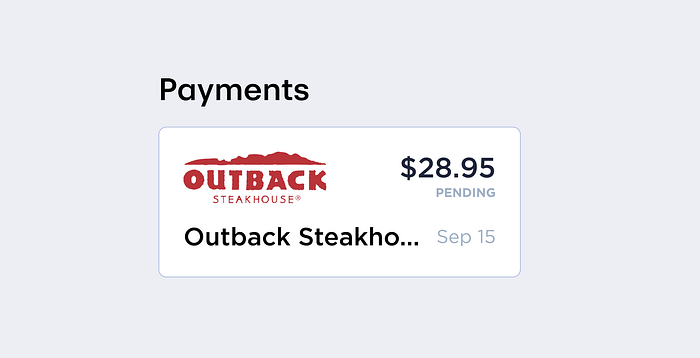
Using ellipses is a nice trick to keep in your back pocket. I’m mentioning it because beginners often miss it and assume they need to change their layout to allow space for all the content.
In the example above, “Outback Steakhouse” can be assumed by the user if they recognize that purchase. If they are unsure of what it is, they can click on that transaction to get a more detailed view.
I should note that I try to use Ellipses only for information that the user wouldn’t need immediately. Or information that can be inferred by the user. If it’s important information, then don’t use ellipses. Ellipses are usually fine to use, but consider the UX when adding them to ensure you’re not confusing your users.
6. Instantly identify any font with WhatFont
Occasionally while browsing the web, I’ll come across a website with a clean typeface that I like. Instead of inspecting the page source, I use a chrome extension called WhatFont.
Whenever I see a font style that I like, I click on the chrome extension icon and can immediately identify what font it is. I then search it on Google, and if it’s free, download it.
7. The dimension and position inputs act like calculators
If you’re not already aware, you can run calculations in any input field in Sketch. Calculations also work in Sketch, XD, Figma, and most other design tools.
To use this, if I have a rectangle that’s 100px wide, for example, I can quickly type 100/2 in the width field, and it will shrink my object down to 50px.
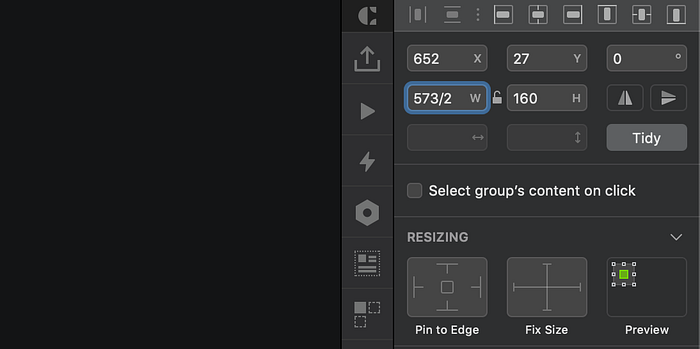
Calculations come in handy all the time when I need to double the size of an object (*2) or shrink an object (/2).
8. Change the opacity of an object by pressing a number
Quick keys for opacity save me loads of time when I need to change the opacity objects in my file.
To use it, all you have to do is select an object and then press any number on your keyboard (1–9), and the opacity will instantly adjust. Want it to be 70% opacity? Tap 7 on the keyboard and badda bing, badda boom!
This works in all the major design programs that I use.
9. Smart layout in Sketch

The smart layout is a newish feature in Sketch, and if you aren’t using it yet, then you’re missing out big time.
Smart layout allows you to adjust the content of a symbol without altering the padding that you’ve given it.
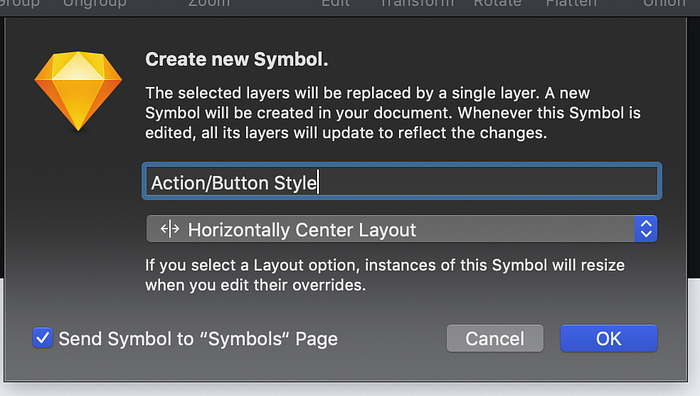
To use it, all you have to do is create a layout, then click, create a symbol, and then set your layout to adjust how you’d like. For button styles, I set the layout to adjust horizontally from the center.
There are so many workflow enhancing possibilities with this feature. To learn all the ways, it can be used, check out Sketch’s blog.
10. Iconjar for icon organization
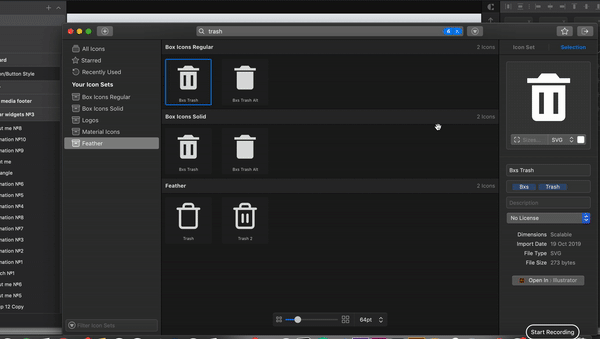
Iconjar is a simple app that allows me to organize and store icon libraries. It saves me from the hassle of downloading an icon every time I need it. Whenever I need an icon, it’s right there in Iconjar.
How it works is simple; first, I find an icon library that I like. Some of my favorite free icon packs are:
Then I download the pack and drop it into Iconjar then give that folder a name.
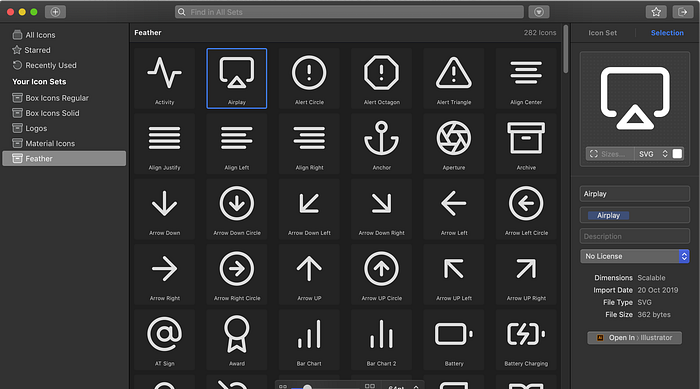
With the icons stored in Iconjar, I can quickly search through my library then drag and drop the icon that I need straight into my design.

👋 Let’s be friends! Follow me on Twitter and Dribbble and connect with me on LinkedIn. Don’t forget to follow me here on Medium as well for more design-related content.
Up next…