Vibe coding tips for product designers
Vibe coding is not there yet for production-ready code. This article will focus on how product designers can get the most out of the new generation of AI IDE tools that have LLMs integrated in them for prototyping and building smaller, less complex apps.

Start in a simple tool and jump to cursor or windsurf
Tools like Bolt, v0, and Lovable are the best when it comes to starting a project (except if you’re building in Swift for iOS). It creates a repository of necessary files, runs all the necessary project setup commands, and creates the dependencies for front-end and back-end. This initial setup is often the most intimidating barrier that prevents designers from venturing into coding,g and these tools can automate most of the challenges at this stage.
- Lovable/v0/Bolt: Ideal for design-focused work with strong UI capabilities for building landing pages, small flows with mock data and quick prototypes of your idea — uses Tailwind, Shadcn or other source libraries and design systems.
- Cursor/Windsurf: Best for complex projects where you want to build a prototype with more logic, data, API and algorithms.
Once you’re happy with the initial draft, You can export the code from these tools to build it more on Cursor / Windsurf.

Use powerful models to break down PRD.
PRD — Product Requirements Document outlines the requirements, features, functionality, and behavior of a product. When building a feature, asking the LLM to break it down into smaller steps so its easier to implement them is key.
Got a big, complex feature that you want to build? Imagine how you would explain it to your colleague. You will try to break it down into multiple parts of the journey, break it down into flows, into screens and into elements. This is the level of detail that should get you to “one-shot” features; which means, you get a highly usable output with the first attempt or prompt.
The first prompt is the most important in Cursor as it sets the base for whole context and knowledge foundation for the AI model. Use powerful models like Claude Sonnet or ChatGPT 4.5 (as of writing) to explain what you are trying to build, why it will be useful, and how you want it broken down. Precisely like how you would explain it to another human.
This prompting technique from Twitter user (https://x.com/benhylak) works really well in most scenarios to build PRD. You can also have a look at the original post.

Know thyself — Know your code.
In the initial stages, as you use Cursor, try to read some code. Ask the AI tool what a few code snippet does even if you don’t understand it. Try to get familiar with the codebase. You can ask Cursor something like,
“What are the most important functions and code snippets for me to get familiar with the codebase”?
You can also select a chunk of code and chat with AI asking more questions about it. I would recommend doing this as it helps you troubleshoot easily as your project grows with more complex features.

At that stage, knowing your codebase will help you overcome blockers by guiding the AI toward the solution rather than hoping for the best while going back and forth in circles (what I call the ‘prompt circus’) without making progress.
Prompting techniques
This is the most important tip. If you don’t want to read the rest, make sure to just read this one.
- When building out a feature, ask the AI to ask clarifying questions after every prompt. This helps build additional context. It’s like talking to a colleague once again, the back-and-forth questioning and answering helps build context around the problem, feature for you and the AI model which makes the results much more correct without having to troubleshoot too much.
- Another prompt for bug fixing is, before trying to code, reflect on 5–7 different sources of the problem, distill those down to 1–2 most likely sources, and then add logs to validate your assumptions before we move onto implementing the actual code fix. This prompt works really well when you’re getting stuck with errors and the AI keeps circling back or breaking your code / deleting important parts (Hence its very important to know your code).
- Use your design tool knowledge: When trying to make front-end changes, try to be very specific. For example: Don’t just say “move the button to the centre with some spacing from text field” but say “Move the button relative to the text field component and space it 4px from the left. It should be fixed in its width”.
- Use @. In Cursor and Windsurf, for example: You can reference exact files or even folders by typing @fileorfoldername. This approach offers several advantages: it helps the AI narrow its context to specific files and conserves your credits.

Use @web or paste web links to give more context to the AI. If you’ve found a good solution online for your problem or if the language has proper syntax that’s published online (like Apple developer guidelines for Swift and SwiftUI), you can link this in your prompt to help it solve a problem.
Lighter context window gets faster solutions.
A context window in AI is like the model’s short-term memory. It refers to the amount of information (text, image, code) that the AI can “see” and remember and work with.

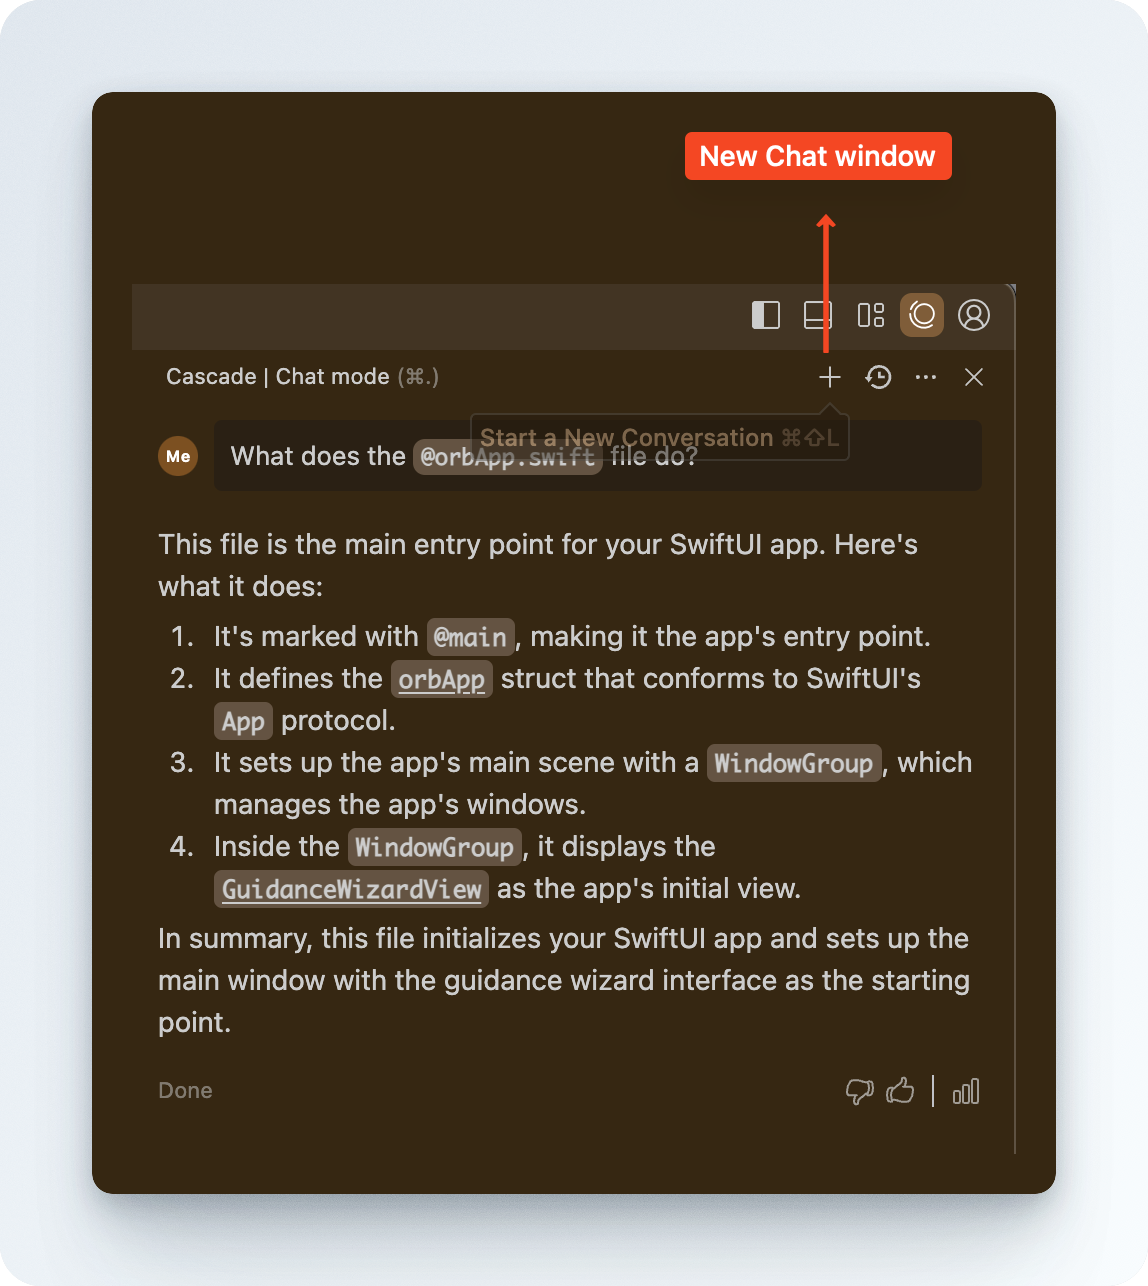
The lighter this is, the faster and cheaper it is to get good quality solutions. Always try to create a new chat by clicking on the + on top in Cursor or Windsurf when your chat starts to get longer or when you’ve successfully completed a feature and, the next feature or implementation doesn’t require context from this current chat window.
Learn to use Git.
Just like how we use version control and have branching systems in figma (if you’ve been working with a design system), learning to version control and perform big changes in a branch on your code is very important. It takes less than 5 seconds to do this once you’re set up with Github and Cursor and I recommend to do this as often as possible after every feature implementation or bug fixes that you’re happy with.
This ensures, in the worst-case scenario, your AI deletes something important, you can always go back to an older version and prevent lots of heartache (speaking from experience as someone who didn’t know to use it properly before).
Don’t overthink. You can do all of this on Cursor directly. The below points are more than enough for a good start and will help you revert back in case something goes wrong.
- Commit changes after each successful feature implementation.
- Write descriptive commit messages that explain what changed and why so you know which implementation to roll back to when things go wrong.

Use overarching rules and project documentation.
On Cursor and Windsurf you can set high-level rules. This ensures that every prompt you make will consider this master rule and try to accommodate this (I’ve found it doesn’t work sometimes but mostly it does)
Project documentation is extremely important from the start. This tip works well with “Know your code” tip as you start to build a mini database of valuable information in markdown (md) files. I generally ask Claude Sonnet or Cursor to create a database.md, appflow.md and more (according to my project) and ask it to fill it with the codebase as a guide. This md files are made to be human readable which is useful to help you get acquainted with the code.

You can then reference these files using @filename prompting technique. So the flow becomes
- Start a new composer (at this point, the AI has very little context on what you are trying to do)
- Type your prompt with good context setting (as discussed previously)
- Use @ to reference your project documentation along with any files if you can map them.
- Once you are done with the implementation, make sure to tell the AI to update the relevant markdown files with the new implementation logic and guidance. This ensures our project documentation always stays up-to date and is the source of truth if we want to reference and learn more about our codebase
Project documentation becomes important the more features you are piling up and more logic your app has to depend on. At some point, the AI model will struggle going through all your files and becomes “lazy” with less context window. At this point, referencing project documentation has worked really well for me.
Bringing custom design from figma to code.
Many of us, we want to vibe code with our own design that we sketched on figma. To get here, I’ve found to shift the mindset from thinking of figma as a sketch book and switch to a very production focussed mindset. Name layers, create auto-layouts (most important tip for getting good code when you use dev mode), name your components, Create clean, logical hierarchies in your layers, add proper constraints.

- You can use dev mode to export code and then bring this into cursor and ask the AI to integrate the feature with the custom UI. This takes a few trial and error iterations.
- You can also use plugins with open AI and Anthropic APIs to achieve this code export and then paste the exported code into cursor to integrate in your project / feature (You can find how to do this online).
- Iterate using specific UI focussed prompts once you get the basic UI / code in place.
For small changes, tweak it manually. Don’t use AI.
Tweaking smaller changes manually is faster, Use your design knowledge. Instead of trying to prompt everything, once you’ve built a good understanding of your project space, you can change values for UI iterations (shadows, color hex values, gradients, corner radius and more) by yourself and look at the preview to finalise your decision. This saves massive time and even credits instead of asking the AI to “Change the corner radius from 24 to 28” when the context window is already less and the AI is struggling to keep up with new requests. It might also mess up and change unintended code which could break your app.
This is by no means an exhaustive list. These are just some lessons I learned over the last few months as I tried these tools to build complex prototypes and ship products. There’s still so much to learn and improve in terms of workflow. Hope these help on your vibe coding journey.
And remember to have fun!


