Swap icons in Figma with icon fonts
For an e-commerce client, I was asked to help the UX team set up a white-label design system in Figma. There was already a design library in place in Sketch, but was specifically designed for the main brand. In one of my previous articles, I previously discussed the idea of establishing a similar system using Themer, but fortunately, Figma has introduced a native feature for swapping styles and components, which has greatly improved the process.
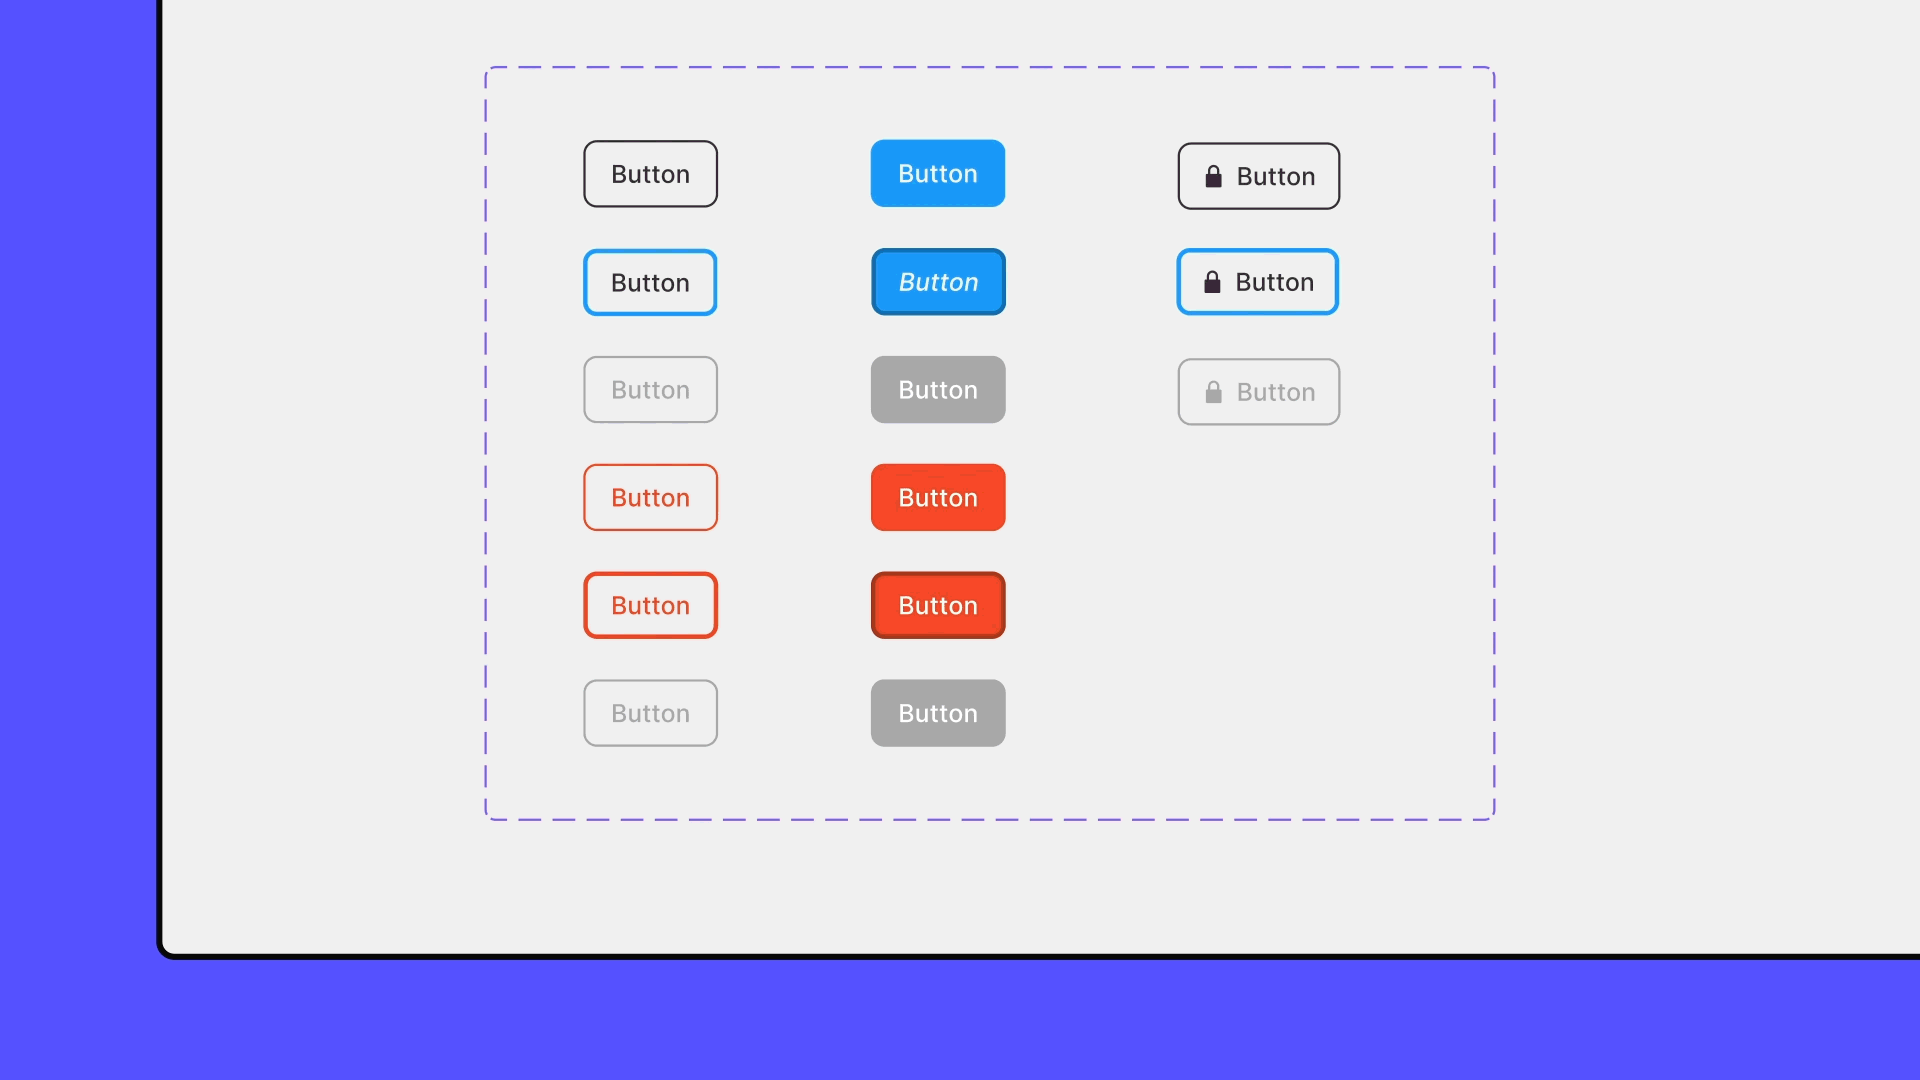
Unfortunately, this feature does not support the automatic swapping of instances that are nested inside components. This means that if vector icons are part of your theming system, they will not be swapped when you switch between libraries.
Using icon fonts in Figma
Since typography styles are swappable, using icon fonts could be a great alternative to go around this. Icon fonts are fonts that contain symbols and glyphs instead of letters and numbers. They work similarly to regular fonts, but instead of mapping characters to specific shapes, they map symbols to specific Unicode values. To create this icon font, I’m using Icomoon. Below, I’ll go through the steps you need to take.
1. Create a new project in Icomoon
Start adding your first icon set from one of the brands. Make sure the icons are in .svg format and don’t forget to outline the strokes. Strokes are not supported in icon fonts. Repeat this process for the other icon sets you need for your project.
2. Preparing the fonts in Icomoon
Once you have uploaded all the icons that you need for your various themes, you can begin matching them in Icomoon.
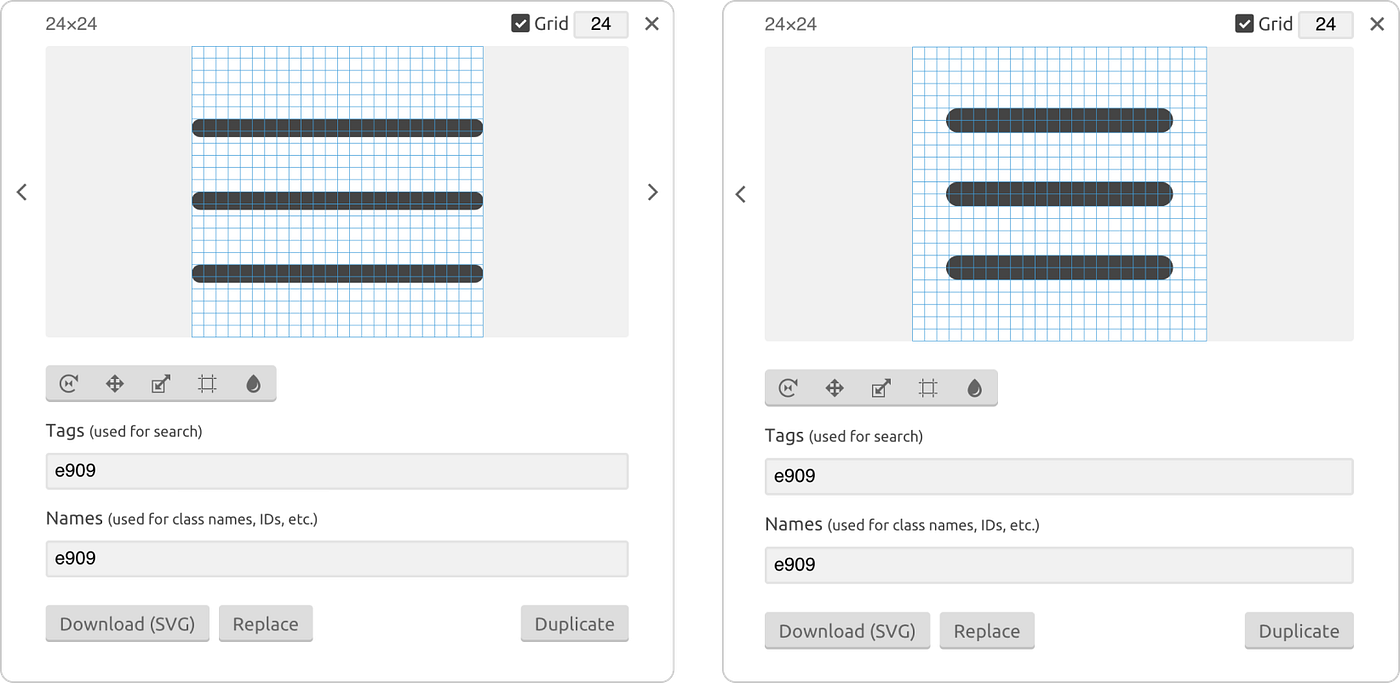
Opening both icon sets in separate browser windows, allow you to easily edit the icons simultaneously. From here, you have to make sure that the icons have the same naming. This way, Figma (and in CSS) can identify the icons when you swap the typography style.
Once you are done with all the icons, you can start exporting both fonts. Download the .zip file and install the .ttf files on your computer (don’t delete the .zip file just yet). Don’t forget to restart Figma after installing the fonts.
3. Start adding icons in Figma
To make the process easier, you can install the unofficial Icomoon plug-in. Open the plug-in in the library where you need the icons. Here, you will need to import a .json file that is inside the zip downloaded from Icomoon. The plug-in will create a set of components with the icons using the icon font.
4. Adjust, re-align and finish up
The plug-in imports all the icons in 20px, but we were using 24px in our icon library. If your 20px works for your library, you are lucky. The steps I took to adjust it to my needs:

- Make the component containers 24px
- Change the font size of the icon to 24px
- Play with the line height and alignment if the icon does not align properly inside the component container
To speed up this process, it’s best to use something like the Find in page plug-in. This allows you to quickly find and select all layers that need to be adjusted. After the icons are properly aligned inside the container, and you are happy with the result, create a new typography style. Make sure the naming of this style is matching the same as the other theming libraries. And you are done 🤌
Things to keep in mind when collaborating
Unfortunately, this method could create new challenges when collaborating and maintenance.
- The installation of the icon font is necessary for all designers to use the icons. (If you are lucky with having an enterprise subscription from Figma, it’s possible to install it for your whole team)
- When a new icon is added to the system, this need to be uploaded in Icomoon and the icon font needs to be reinstalled (for all brands). After that, you also need to restart Figma.
- It’s important to have a central place where you keep track of the versions. Potentially even with a simple changelog to keep track of the changes.
If you have any questions or suggestions after trying it out, feel free to leave a comment.
A brief introduction about me and why I’m writing this. My name is Sander, and I work as a UI/UX designer in Amsterdam. I enjoy working on design systems, prototyping, and in general, designing simple but effective user interfaces.