Figma: 5 ways to add animation to your designs
I like Figma, it’s one of those tools that from the first time I tried it I understood there’s something new and interesting here, since then it only got better with every update.
As a designer/developer I always look out for new tools, both at the design front and at the development front, we clearly are in the golden age of new tools in both of these fronts.
Figma has come a long way since I first tried it out. It matured as one of the most influencing design tools around, it also got an ecosystem of plugins around it and a few new tricks up its sleeve.
Somehow I see a lot of people eyeballing towards Adobe XD, Protopie, UXPin or Principle for their animation features, so I decided to write this article to let you know what’s possible these days in Figma.
As our tools keep evolving I’m sure Figma will get more and more features and this article might seem quaint in a few months, but this is a snapshot of what’s possible today.
In this article I will go over the different methods of adding animations to designs done in Figma, from the most simple to the complex, feel free to hop around them as you wish, this is my order:
- Method #1: Adding GIFs
- Method #2: Figmotion
- Method #3: Simple Prototyping in Figma
- Method #4: Figma’s Smart Animate
- Method #5: Code Your Animations
This article is a result of a workshop we did in Google For Startups TLV Campus last month, it was really inspiring to see the reaction on peoples’ faces when we got to the animation part.
All examples shown here were made in collaboration with Noa Shpinat from Peanuts Studio and Ido Zaifman, Figma’s local community leader, many thanks to both.
Method #1: Adding GIFs
GIFs are the simplest way to add animation in Figma, you can just drag and drop GIFs like any other image file and it should play automatically when you enter Present mode.
Figma can display any part of the GIF on the frame itself. If you want to change the still frame Figma presents while editing your design, you can change it in the Fill settings in the Design tab, just click on the GIF and drag the mini timeline.
You can find GIFs all over the internet, you can search for Animated GIFs specifically in both Google and DuckDuckGo by clicking the Images tab and filtering the results by Type and then selecting GIF (or Animated GIF, depending on the search engine).
There are also some specialty websites that offer an abundance of GIFs for common use such as Giphy, Tenor, Gifbin and more, those usually work on a community of users that upload their videos to convert them to GIFs for social media, but a bi-product of that is that you can find the perfect GIF to your project.
Can’t find the perfect GIF? Make your own! For more details see Method #2.
Method #2: Figmotion
GIFs can be made with a variety of tools. Most notably is Adobe Photoshop, but this is Figma, so let’s make a GIF with Figmotion, which is a plugin for Figma that lets you make keyframe-based animations (kind of like a mini version of After Effects).
Figmotion is a bit tricky because it’s an external plugin, it has some bugs and unintended consequences sometimes. It’s a great way to add motion to your designs and render those designs as a video or a GIF to share with other people on the team.
How do I install a Plugin in Figma?
First of all, if you don’t have the plugin installed, go to your Figma app and under the Plugins menu go to Manage Plugins, here you’ll see a few featured plugins. If Figmotion isn’t there go to Browse all plugins and there will be a list of all the plugins available, you can go to the search box at the top right corner and just type Figmotion.
Now that we have the plugin installed, let’s dive right in, to open Figmotion go to Plugins and select Figmotion, Open Figmotion, the plugin will be opened in a new window above everything else.
If you want to animate an element you must insert that element inside a frame, so you’ll have a canvas for the plugin to work on.
The plugin might prompt you to select a frame that you want to work on. It refers to Figma’s frames, like artboards or canvases in other apps, not animation frames, which is something else.
Tip!
If you select your Figma frame and then open Figmotion, it will automatically select the selected frame as the frame you’ll be working on.
Now you should be able to see your elements in Figmotion layers and you can animate them as you wish. You can also go directly to a specific element by selecting it from the list at the top right corner of the plugin window.
Now let’s say you want to animate the rotation of your element, first find in the list of animatable properties the rotation line and then click on the keyframe button (looks like a rhombus, just like in After Effects).
We can scrub the timeline or just use the 0ms, 100ms, 200ms links (yes, those labels are clickable links) and then create another keyframe by clicking on the same keyframe button as in the above screen capture.
After creating the keyframe we can just click on it and manually change the value at this time, or change the element rotation in Figma and then click on the keyframe to edit it and click the brush icon to grab Figma’s current state, this workflow seen in the screen capture below.
After you’re done with your animation, Figmotion can either render it out as a video or a GIF by clicking the Render button and then selecting the appropriate format.
The plugin can also export your animation as code by clicking the Export button, you’ll have to choose between CSS and JSON files, a good rule of thumb is to export CSS for the web and JSON for mobile apps, even though sometimes you’ll be asked to break this rule, just ask your developers or export both.
The code it exports is relatively clean and easy to read, even though sometimes it saves more information than it needs and some parameters, like circle arc, just can’t be achieved in CSS.
Method #3: Simple Prototyping in Figma
Prototyping is the simple act of connecting different screens (or frames in Figma) in order to construct an interactive simulation of your app or product. In this method we’ll dive in to the prototype options Figma has to offer, all but the Smart Animate feature, which we’ll cover in the next method (which is Method #4).
If you’ll switch to prototype mode from the Prototype tab (on the right of the screen there’s 3 tabs: Design, Prototype and Code) you’ll notice that every object you select, including Figma’s frames, have a little white dot on its right side.
These dots let you connect the frames or objects to each other, if you’ll click the dots you’ll be able to drag an arrow from one frame to the next, that way you’ll have a flow ready to go.
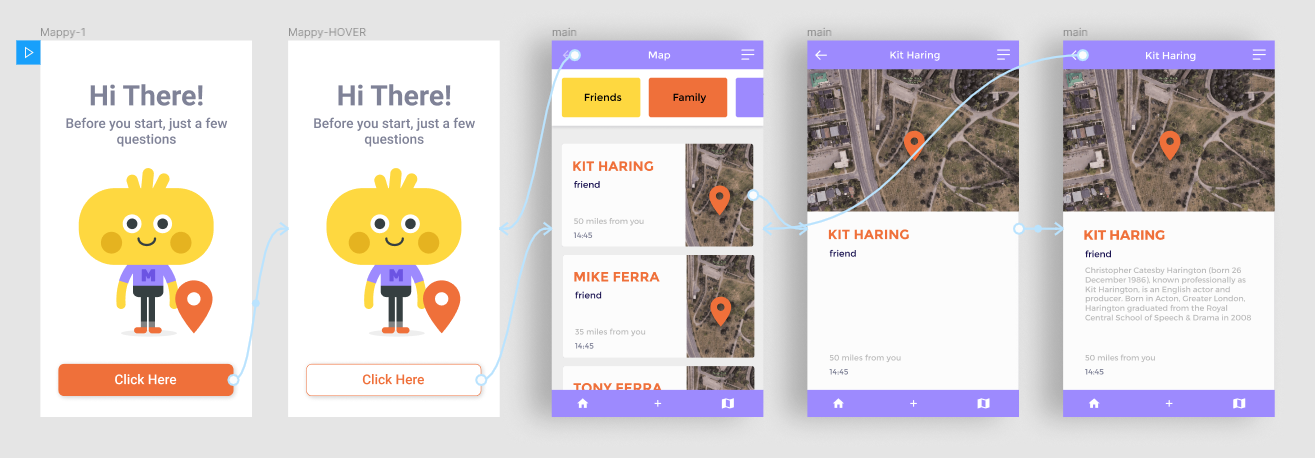
After connecting the screens you’ll see on the Prototype tab options for your selected interaction. If you can’t see the options titled Interaction and Animation, you need to click on one of these blue arrows.
Once you selected an arrow, the option titled Interaction is where you can pick the kind of trigger and behavior for this interaction. The Animation part is where you’ll pick the animation style and duration.
I won’t cover all the triggers but a few important ones are:
- On Click: means that the interaction will happen when the user clicks your selected object. If the Interaction is on a frame, so the user will be able to click anywhere on this frame to trigger the interaction.
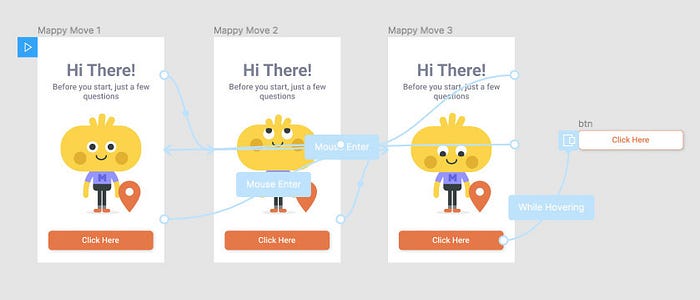
- While Hovering: your interaction will begin when the user hovers on your selected object or frame and it will return to its initial state when the user is done hovering.
- Mouse Enter/Mouse Leave: the interaction will begin when mouse enters or leaves the selected element (or frame), very similar to While Hovering but it won’t automatically bounce back when the hovering is over, with both mouse enter and leave you can fake an interaction that feels about the same. Best to use when you want something to happen when mouse enter and not go back automatically when the hovering is done. Think about menus and sub menus, for example.
- After Delay: this interaction happens automatically after the specified time is over, if your delay is 200ms, the interaction will begin after 200ms starting from when the user arrived to this frame. This interaction type is limited to frames only, you can’t choose this kind of interaction when prototyping buttons, for example.
Now that you selected your trigger, you can see different options for the behavior of this interaction. The most common one is Navigate To, which gives you the option to select a different frame that the user will arrive to when this interaction is over.
You can also use Open Overlay to swap objects on the frame without completely change the entire frame, this interaction can also add a semi-transparent background and the option to close the overlay when clicking outside of the object, think of popups or alerts.

Your interaction is almost ready, all we have to do is to select the Animation we want from the menus. When you’ll select one, you’ll see how it looks in the little preview with fake A and B screens (like in the GIF above) in your animation menu in the Prototype tab.
Animations in Figma can be set with 3 parameters, animation type, timing and duration.
Animation type: Figma gives you a few preset of animations to pick from: Instant means your flow will change instantly, with no animation at all. Dissolve is a fade between 2 frames, Move In/Out, Push and Slide In/Out are all common UI prototyping options, you probably know them from just using mobile apps at this point.
Timing: This means easing, every animation in Figma can be set to Ease In, Ease Out or Ease In And Out. Easing refers to the slowness of the motion in your animation. Ease In means your animation will start slow and will speed up as it goes along, Ease Out is the opposite, your animation will start real fast and will die out slowly. Ease In And Out means your animation will start slow, speed up and then die slowly at the end.
Duration: in Figma, the duration of any animation is set in milliseconds (that’s what the ms stands for), it means you have 1000ms in 1 second, so if you want some animation to take half a second that’s 500ms. Usually in UI animations nothing takes more than 500ms and most animations should be even snappier at 200ms-300ms.
When you’re done with prototyping, you can click the Present button to see it in action (the button looks like a play button, next to the Share button at the upper right corner).
In the Prototype tab, when nothing is selected in your document, you can change the Starting Frame, which will be the first frame of the prototype when you click Present, at least when no other frame is selected, and you can also choose the Device your prototype will be in. Androids and iPhones have a slightly different behavior, so stay true to your platform of choice.
Tip!
You can also select your Starting Frame by dragging the blue play icon to your desired frame, no need to dig through the menus.
I’m sure you saw in the Prototyping options a little option called Smart Animate and wondered what is does, well now it’s the time to get into Figma’s most interesting animation tool.
Method #4: Figma’s Smart Animate
Smart Animate is a way to connect two similar frames and get a fluid animation between them as if you animated it yourself. Figma is interpolating the frames for you to convey the motion you probably always wanted.
You can think of Figma’s frames as animation key-frames instead of artboards, that way it’s more intuitive to understand, you make the A and B states (the key-frames) and Figma makes the in-between frames for you.
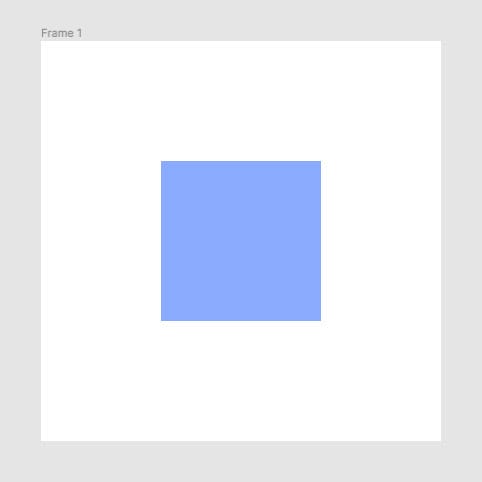
Let’s make a simple example, this rotating square you see below, it is built from two frames (Frame A and Frame B), Figma flips between them when they’re clicked, you can see both frames on the left and the resulting prototype on the right.
The Smart Animate interaction is done just like any other prototyping in Figma (see Method #3 for more details), you just select the frame or object that you want to connect (our Frame A), you make sure you’re in the Prototype tab in Figma and then you just drag from the white dot in the right side of your selected object or frame.
After that make sure to pick Smart Animate from the Animation sub-menu and pick your preferred Timing (Ease In, Ease Out etc.) and Duration (in milliseconds), that’s it, Figma will take care of the rest.
Figma doesn’t always make it right, you need to have the exact same layers for it to work properly. It might not be able to match the layers if there are some layers missing in either frames. Figma also can’t reliably pick the objects you mean to animate if they have a different name in each frame, or if they’re not in the same order in relation to other layers.
Also you can’t edit the actual vectors of your object in animation, not even the corner radius. Think of Smart Animate as a transform you make on top of your object, you can change the position, rotation and scale of an object but not much more, this is the right method for animation in web browsers as well, so Figma does prepare you to learn CSS in the future (Method #5).
Tip!
Keep it simple and keep your layers organised, don’t change the order of the layers mid-animation and don’t change the frame size or object vectors.

A good example of this would be this cute character looking around at your mouse cursor (see above), it was all done with Smart Animate and invisible rectangles that change frames on mouse over.
You can also mix and match those animation methods, the button hover effect is created with Open Overlay, which we saw in Method #3, even though the rest was done with Smart Animate, you can also throw GIFs into the mix, as we saw in Method #1.
Method #5: Code Your Animations
The last method I’ll share here involves coding in CSS, if you’re unfamiliar with it at all and/or have no desire to learn it that’s ok, just know it’s a good way to expand your skillset.
Having said that, I think all digital-first designers should learn how to code in their preferred platform, I think CSS for product designers or UX designers is the bare minimum, because at the end it does affect your design in the pixel level and understating how it works can give you the technical know-how to make better suited designs.
Figma is a great tool to design in, but the animation tools we discussed until now (methods #1–4) are a bit lacking, for example I can’t view my animation with some custom easing and not just ease-in or ease-out.
A simple enough way to do that is to just export your frame as SVG file. SVGs are great, they keep everything vector and all objects separated, it also can become an animated SVG with just a few lines of code.
In order to make changes to the SVG file you exported from Figma, please open it with some code editor like Visual Studio Code, Brackets, Atom, Sublime Text or whatever highlights your code.
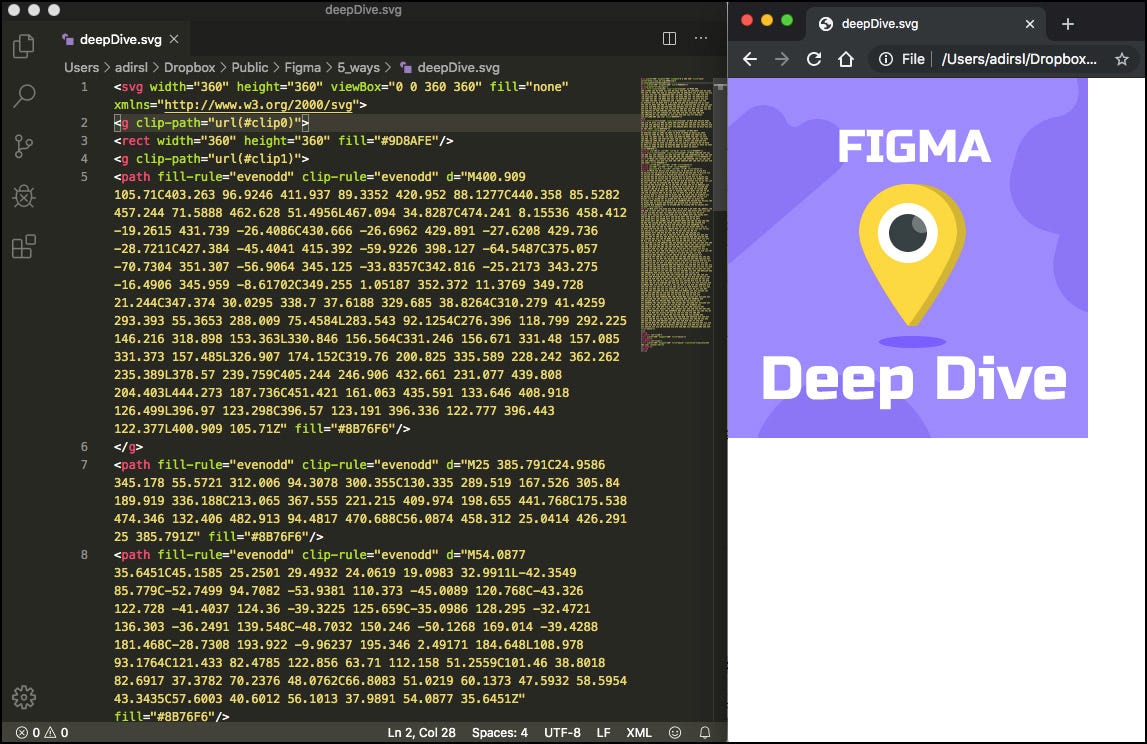
First of all after we opened the SVG file twice (once in your browser and once in your code editor) we need to find out what it is we want to move, the simplest way to achieve this is in the browser, just hover over the object you want to animate (the pupil in my case), right click on it and select Inspect.
Now it should automatically highlight the line in your code where this element lays, this line you can search for in your code editor, once you find it you need to add an id to your element, so in my case it’s this line:
<circle cx=”180" cy=”155" r=”19" fill=”#363F41"/>and it became this:<circle id=”myCircle” cx=”180" cy=”155" r=”19" fill=”#363F41"/>
After that you’ll need to go to the top of your code and right after the opening svg tag ends you need to add a style tag so your code will look very similar to this (in structure at least):
<svg width=”360" height=”360" viewBox=”0 0 360 360" fill=”none” xmlns=”http://www.w3.org/2000/svg">
<style>
</style>
<g…/>
<rect…/>
If you know CSS then you’re probably already typing away inside those style tags, but just to check if it’s all working, please add your object inside those tags with a test fill or stroke, like so:
<style>
    #myCircle{
        fill: red;
    }
</style>
This should give you an idea if something went wrong. If you save your code and refresh your browser, your element of choice should now be painted red, if your object has no fill, you can try the same with stroke: red; instead of a fill, if nothing is changed, please make sure the id you gave your element and the code above matches. In CSS you need to insert # sign before any id, so in my example above the id is myCircle. lastly make sure you got both opening and closing brackets, I usually forget the } at the end.

Enough with this structural work, it’s time to animate our element, so back in our CSS part (the style tag) we need to add some animation properties and some keyframes.
In the example below, all properties inside #myCircle are animation properties (you can delete the fill: red; from before) and all the properties inside @keyframes myAnim are keyframes:
#myCircle{
    animation-name: myAnim;
    animation-duration: 1500ms;
    animation-timing-function: cubic-bezier(.21,-0.44,.79,1.45);
    animation-iteration-count: infinite;
}
@keyframes myAnim{
    0%{transform: translate(0,0);}
    20%{transform: translate(0,0);}
    30%{transform: translate(-10px,-5px);}
    50%{transform: translate(-10px,-5px);}
    60%{transform: translate(8px,2px);}
    90%{transform: translate(8px,2px);}
    100%{transform: translate(0,0);}
}
This is how CSS animations work, you add properties to the object like the duration of the animation, 1500ms (a second and a half) in this case, you add the name of the animation, which is just something we make up, similar to your element id but it’s the id of the animation’s keyframes.
Then you add your keyframes which you place on a pre-defined timeline of 1500ms in length, because that is the duration of the animation we add to our element, the keyframes we add now will be referring to this timeline so 50% means the keyframe will be in 750ms from the starting point.
Some more important properties are animation-iteration-count that gives you a way to loop your animation, infinite means it will loop forever and a number like 3 means it will loop 3 times and then the animation will stop.
Another one is animation-timing-function which gives you the ability to customise your timing (easing), you can specify ease-in, ease-out, ease-in-out, linear and more but the real fun is the cubic-bezier option, you don’t need to budge the numbers manually, you can use the tool cubic-bezier to do the heavy lifting and just copy and paste it to your own code.

This method of animating SVG is fine for stuff like icons, logos or emojis but for most things developer will build the entire screen out of HTML+CSS, not SVG, but still this gives you a much richer way to add animation quickly, you won’t be stuck with only ease-in and out and the developer who might recreate this in HTML still has a great guideline for the animations because both HTML and SVG can use the same CSS code for that.
If you want to make your prototypes in “real” HTML code, you can start by copy and pasting what Figma gives you in the Code tab (next to the Prototype tab), this will show you all the styles of your currently selected object and you can learn a lot from that.
You’re also welcome to poke at the animation I did for this project using HTML+CSS to animate the button and blinks of this character, you can edit the code as much as you want, it’s available openly in this link.
Summary
Figma has a lot more methods to add animation than most people realise, you can add GIFs, add animation with Figmotion, Prototype, Smart Animate and if those are not enough, you can always export it to SVG and then tweak your code to animate it.
Once tools like Figma enable designers to expand their skillset into animation and coding, it might be something we’ll start seeing not only in articles and tutorials but also in job descriptions, so we might as well get there early.
I know that Method #5 with the code was a little daunting for people coming from a design background that have no practical coding skills, but even just knowing that it’s an option gives you more freedom to think of your animation in less closed terms than what Figma gives you.
Code for designers is a broad term that requires a whole article, we can get into how Figma displays the code, how to export it and modify it to your own needs, if you’re interested in another more code-focused article on this subject, please let me know in the comments.
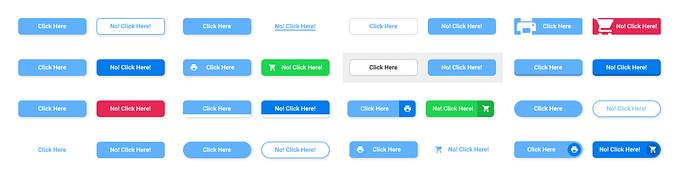
If you enjoyed this article, I have another good one about Button Differentiation and another one about Motion Design in Design Systems, and of course claps are very much appreciated.