How to set up custom design linting in Figma using the Design Lint plugin
A tutorial for creating a design linter specific to your team.

What is Design Lint?
Back in 2019, I released a Figma plugin called Design Lint. My goal was to help my team, other designers, and myself to find and fix errors in our work more easily.
Design Lint loops through layers you’ve selected to help you find missing styles. When you write custom lint rules, you can check for errors like, color styles being used in the wrong way, flag components that aren’t published to your library, mark components that don’t have a description, and more.

My goal with this tutorial is to:
- Help you publish your own version of Design Lint to your design team.
- Help you write your own linting rules so you can make the plugin more valuable to your team.
What you’ll need:
- Some knowledge of Javascript
- A Github account, some knowledge of Github commands, and comfortable using the terminal
- Figma account and some knowledge of the Figma API
- An editor like VSCode
Create your own private Design Lint plugin
Let’s set up Design Lint as your own private plugin.
- To start, visit the github page and fork the repo.
The plugin is open-source, MIT license, and doesn’t make requests to any external servers. It’s safe to use on your private design organization's file, but if you don’t trust me feel free to read through the code!

Once you have your own version of the repo, use the git clonecommand in your terminal using the SSH link to clone the repo to your local environment.
Before we create our own private plugin in Figma, let’s make sure it compiles locally.
Running the plugin locally is documented here on the Github README. Navigate to the project within your terminal and run:
- Run
yarnto install dependencies. - Run
yarn build:watchto start webpack in watch mode, this is the command we’ll use as we make changes to the plugin.
Add your version of Design Lint to Figma
Within Figma, navigate to your account, then to the plugins tab (I believe you need to be App and not in the browser to do this).

On the plugins tab, you should see a big call to action for creating a plugin, click on the + button.

Then we want to use the “Link existing plugin” option, and select our manifest.json file that’s in our Design Lint folder. This is a good time to rename the plugin to something specific to your company.
- You can open the manifest.json file and rename the title to “My Companies Design Lint”

Now you should see the plugin in your “In Development” column. This is where you can publish a release of this plugin to your entire org. We’ll do that later, but now we can run the plugin in Figma!
You can run in development plugin using the right click menu or the plugin menu in the top bar.

Now you should have your own in-development plugin ready to use as we make changes.
Adding Custom Lint Rules
Now for the real meat and potatoes. Let’s write our own linting rules by opening controller.ts and lintingFunctions.ts files.
Controller.ts is where the majority of Figma related code is written, it’s the file that calls the Figma API to loop over layers, fetch information on styles, and post messages, etc. It’s also where we decide what linting Functions are run.
lintingFunctions.ts is where we perform the actual linting, like checking to see if a layer is missing a style. We technically can add our own linting functions in either file but it felt cleaner to separate them.

How linting works
Out of the box, Design Lint loops over all the layers you’ve selected as a user. For each layer, it checks to see what type it is. The function that does this is called determineType() on line 267.
Is it a text layer? Then lint each property this layer has. Text layers have properties for type, fills, effects, and stroke, so we run generic linting functions to check each.
A layer can have multiple errors, so we create an empty errors array that we can push errors to.
These generic functions like checkFills(); work like this:
- Does this layer have a fill?
- If this layer has a fill, check to see if it’s a style.
- If it’s a style, then this layer isn’t an error.
- If it doesn’t have a style, create an error.
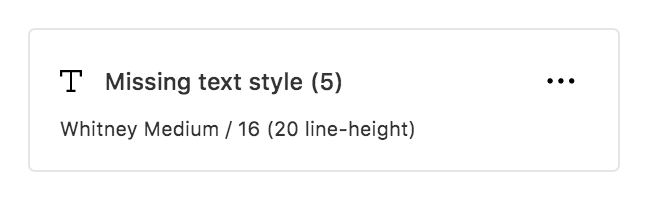
Errors show up in Design Lint UI with some information about the error we found.
Writing a simple lint rule
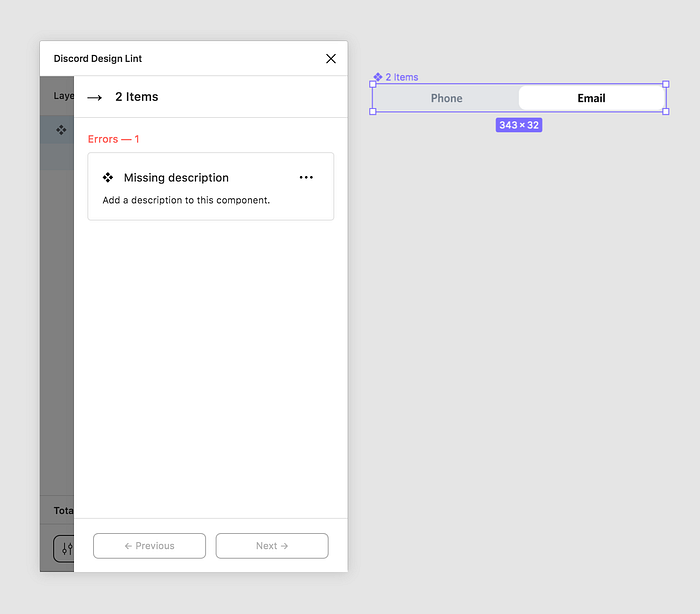
Let’s say our design team is creating components without descriptions. We could write a lint rule to remind our designers that we need to document our design system as we build new components.
First, let’s find the function for linting layers that are components.
According to the Figma API, components have a property called description. This is set to an empty string if the component doesn’t have anything in the description field.
- Let’s create a new function in
lintingFunctions.jscalledcheckForDescription.
Here we check if the layer (also known as a node), has a description, if it doesn’t, we create an error to show to the user.
- At the top of
controller.tsmake sure to import your new function.
import {
checkRadius,
checkEffects,
checkFills,
checkStrokes,
checkType,
checkForDescription,
} from "./lintingFunctions";- Then add the new function to be called in
lintComponentslike this.
Now we can run our plugin on a component and see our new error!
If you’re familiar with the Figma API you can probably stop here knowing how the linting runs, where to write rules, and how errors are sent to the user. However, this example didn’t utilize our design system at all, so let’s try something more specific next.
Writing an advanced lint rule
Let’s say our design system contains several colors that look the same but are used for different things.
We have a few of these at Discord, where white is both a text color for dark theme and also a background color on our light theme. We use two distinct styles for these but it’s not hard to see how someone may use them incorrectly.
Let’s write a function that returns an error if a color is being used the wrong way.
To start, we’ll need to collect a list of colors from our design system we shouldn’t find on a text layer. More specifically we’ll need each of our color style’s key.
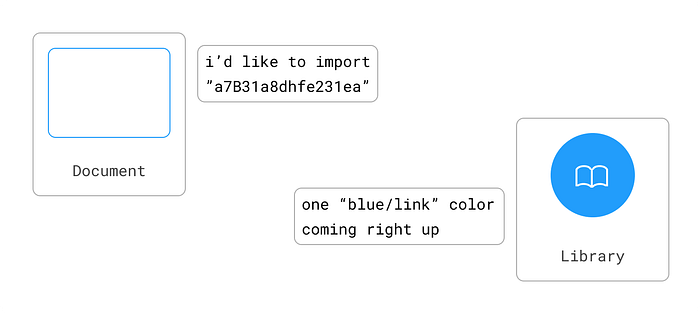
Every style has a key, which are unique identifiers that Figma uses to reference a style imported from a library. Basically, a normal plugin doesn’t have access to your design system for security purposes. In order to access a component or style from your library, you need its specific key.
We can gather a list of key’s by using a plugin like Inspector or by using the Figma API in the dev tools console when you have your design system page open. Running the command figma.getLocalPaintStyles(); will return information about your styles that you can use.
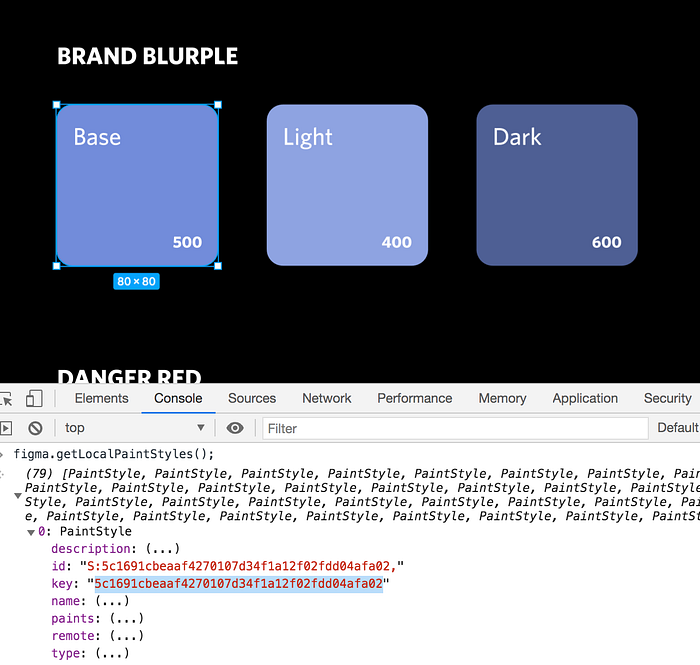
Once I have a list of keys that represent the colors I want to check for I can write my next function. In my example, I’ve collected a list of colors that should only be used on text layers.
The way this function works is
- We create an array of text colors.
- We check to see if our layer has a style already.
- If the layer has a style, we check to see if it matches any of our text colors.
- If it does match, we can return an error letting the designer know this color is being used incorrectly.
- If there isn’t a style on this layer yet, we still want to check it for other fill errors which is why we still use
checkFills();
Next, I need to import my function again, so our import list will look like this:
import {
  checkRadius,
  checkEffects,
  checkFills,
  checkStrokes,
  checkType,
  checkForDescription,
  checkBackgroundsForTextFills,
} from "./lintingFunctions";
Then, I need to add this new function to the types of layers I want to lint. Obviously text layers can use text colors so we don’t want to add it there. Instead, I can check for it on layers like rectangles, frames, or lines.
Now when I run my plugin I should see errors being returned when colors are being used the wrong way.

Wrapping up, publish your plugin internally
Once your plugin is working and ready to be used by your team, go back to your plugin tab within Figma, click on the three-dot menu near your plugin name and publish your plugin internally.

Now your entire team can use the custom lint rules you wrote! As you explore the Figma Plugin API you may come up with other helpful rules to keep your designs organized and free from common errors.
If you have questions, please feel free to leave a comment here or on Github! If you’re interested in more plugin talk, design, or development follow me on Twitter or on Figma Community.