Techniques to Display Text over Background Images

It’s become popular to overlay text labels on background images. But the image could be anything. How does your user interface design accommodate that? Can text overlay remain readable always?
The last thing you’d want is your users straining to read such text. This is all the more important on mobile. Smaller screens and smaller text make it harder to read.
But don’t worry. There are design techniques that can help make your text readable.
First, let me show you some design mockups that use text overlay.

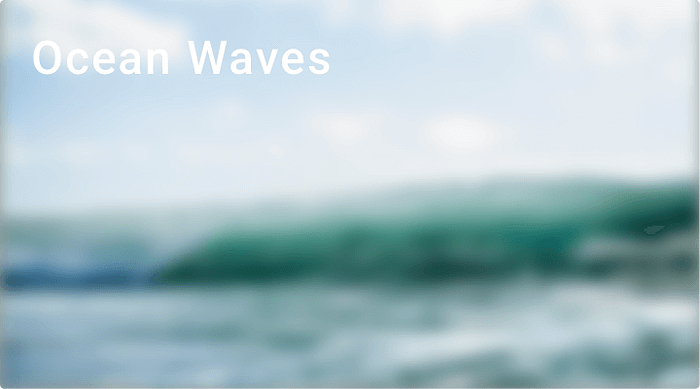
Here’s another.

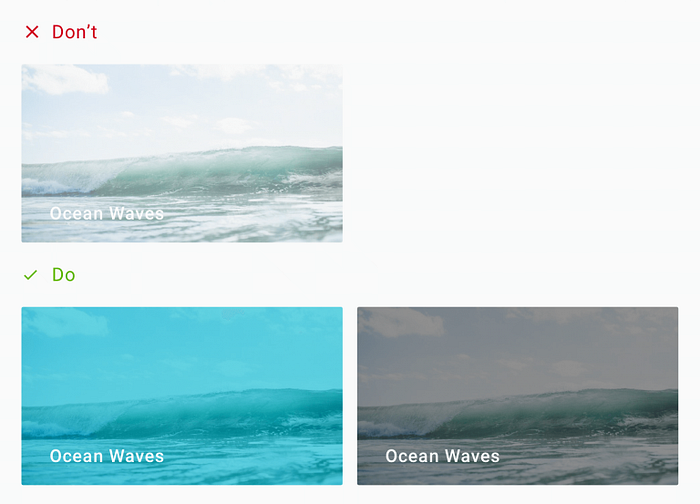
A good eye will immediately notice the problem with these two designs. Take the second one with the sea waves. If the wave foam was on the lower half of the image, would that text be readable?
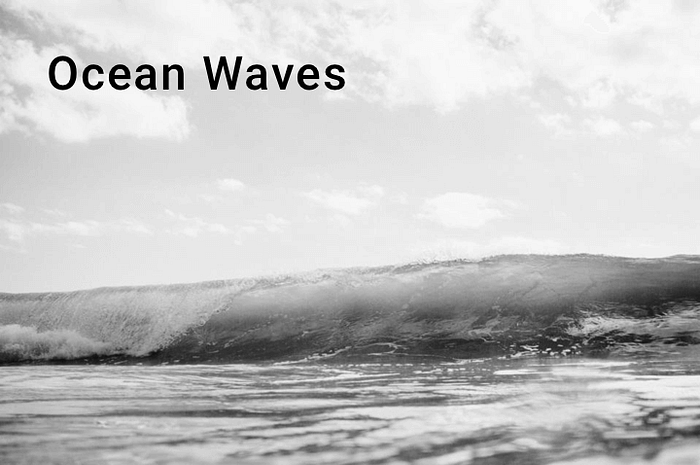
Let me try to recreate that design for you.

How readable is the text now?
Alright, its not the same picture. But it’s still ocean waves.
The background image is outright disturbing. But the image is not to blame. After all, when you decide to overlay text, you must be ready for ANY image. Which means, the image could be anything.
Good design is when we factor in all possible scenarios.
Now don’t get me wrong. Those 2 designs are not bad in any way. In fact, I love the typography used in the second one. Both are well-designed interfaces by talented people. It’s just that, some interface designs (mockups) are only for aesthetic purposes.
Anyone who translates them into a working project will immediately recognise what’s wrong. The text displayed, does not account for its background images.
However these mockups are only examples. It assumes that whatever be the image, the text will be readable. But my design attempt just showed you that that’s not the case.
The 2-in-1 problem with text overlay
Now we could say that this pattern became overly popular thanks to Card design. I mean, most of the card designs include an image, with text overlaid on top. Not to say that its bad, but there are two things that are largely not considered.
When you overlay text on an image, you sacrifice two things:
- Image clarity
- Text readability
Readability is the ease with which a reader can understand a written text. It is a measure of how easily a reader can distinguish individual letters or characters from each other. — Wikipedia
Overlaying a text prevents viewing the image completely. Moreover, your text may not be readable.
The image can be anything.
Now, most of the examples above are mockups. Which means those are ideal scenarios. The text matches perfectly against its background. Things can immediately go wrong if your using white text over a whitish or light image. The same holds true for black or darker tones.
Now we know the mess we’re getting ourselves into. So let’s look at what we can do about it.
Text Overlay Solutions
There are different approaches to making our overlay text readable. I want you to understand that these are different solutions to a single problem. There is no single solution answer.
Moreover, deciding on what to use ultimately boils down to your personal preference. Or you can even decide upon one, depending on what fits your brand style.
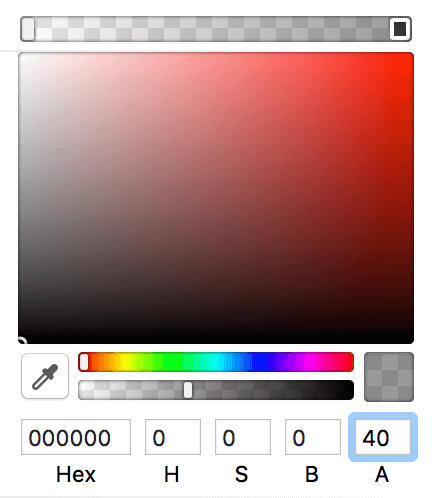
1. Using a Scrim
A Scrim is a semi-transparent gradient layer that helps Text appear more readable against backgrounds.
A scrim is a solid to a transparent gradient that sits behind a Text Label. So for instance, your text label could be a constant white. Then, your scrim would be a gradient going from, say 40% black to transparent.
I leave the opacity percentage to you. Again that’s a matter of personal taste.
But a 40% black to transparent works really well. It’s not too evident and doesn’t disturb the image. It fades smoothly, giving the text label the contrast it needs, making it readable.

Recommended Scrim guidelines:
- 30–70% opacity (40% is ideal)
- 100% to 0% opacity black
- size: 50% of image height
These are not hard rules. But as you can see from the above design, these settings work well.
Also, Material Design talks about text overlay on Imagery in their guidelines.
Advantages:
- Very simple and commonly used solution
- Increases contrast for better text readability
- A subtle design change that is hardly noticeable
Disadvantages:
- Sharp gradients can break the image’s cohesiveness
- Can block the image if visibility is too high
By far, using a scrim is the most popular solution for solving the text overlay issue with images.
But wait, don’t go yet! There are other solutions which might suit your taste better.
2. Overlay the entire image
Like the scrim solution, but instead of a gradient, you’d apply a full 40% black to the whole image.
That’s right. Maybe the image isn’t important to you. The text label is your priority. Or maybe the text covers the entire image’s size.
In such a situation, using a scrim doesn’t make sense. Since the scrim is a gradient, your text becomes unreadable half-way across.
So since the text covers the whole image, the solution is to darken the entire image. In short, that’s a 40% opacity black on the image.
Advantages:
- Useful for large text (headings) that cover the entire image
- Useful when text is your priority and not the image
Disadvantages:
- Can obscure the entire image
- Could sacrifice image visibility
- Makes the image appear as if it’s for cosmetic appeal only
Here is how Medium uses this technique.
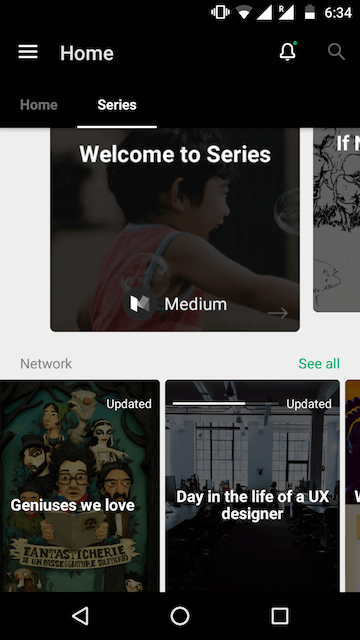
Notice that the images are a predominant part of the user interface. However, the text labels over them is what gives priority.
When I see want to click on a thumbnail, I do so by primarily seeing the text rather than the image. Hence the image here is only for visual appeal. So to allow text to stand out, the entire image is darkened.
Here’s another example.
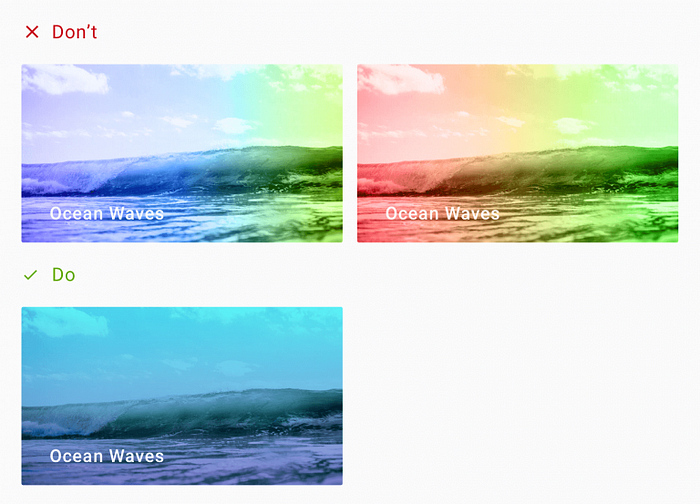
3. Color Overlay
This is like an overlay. But instead of using black or white to darken or lighten the image, we use a different color.
Setting a color overlay on an image is the perfect way to neutralize a busy image. It blocks out all the different colors, making the image monotone.

Usually, the color of choice is the brand color.
Here is an example.

4. Soft gradients
Remember that to use this correctly, your text should have enough contrast.
Also, when you use gradients, don’t use visually jarring colors. Chose colors that work together in harmony.
You can use web tools such as Coolors and Kuler by Adobe. These can help you generate color pairs that work well together.
Here’s an example.
Advantages:
- Better brand emphasis (if brand color used)
- Single color tone allows room for better text contrast
Disadvantages:
- Not suitable for pictures of people as it may not be recognizable
Here’s a great collection of soft gradients you can use.
5. Semi-Transparent Image
This technique involves using a semi-transparent image against a solid color background. It helps ‘calm’ the noisy background, so the text can stand out.
The technique consists of 3 layers (from the bottom):
- Bottom — solid color
- Middle — image (semi-transparent with 40% opacity)
- Top — Text layer
Advantages:
- Reduces image noise allowing text to stand out
- Makes the image monotone reducing color distraction
Disadvantages:
- Image may lose its important details
- Only suitable for images whose purpose is purely for eye-candy
6. Blur
Applying a Gaussian blur softens an image allowing text to become more readable.
Smoothing of images by reducing image noise and detail — Gaussian Blur
iOS folks will be familiar with this technique. iOS design principles use blur to denote depth. Whereas Android (Material Design) uses shadows to denote depth (elevation).

NOTE: Consider using a Drop Shadow for increased text contrast.
Make sure you don’t blur the image too much that the underlying image is completely unrecognizable!
Advantages:
- Helps reduce the ‘busyness’ in images
- Softened images give text more priority
Disadvantages:
- Completely sacrifices the image for text
- Still doesn’t solve same color overlay issue
- May not suit your product style. For instance, using blur in a Material Design world?
7. Text Highlight
Here, we apply a background color to the text itself. This effect mimics the traditional way of highlighting text on paper.

This technique works well when the design has minimal text and a spacious background.
Remember that the highlight color doesn’t always have to be black. The example on the right borrows the dominant color from the image. This creates a higher sense of belonging with the image.
Android folks will recall that the image’s dominant color can be extracted using the Palette API.
Advantages:
- Good text clarity against any background image
- Good contrast
Disadvantages:
- Choice of highlight color may make text feel disconnected from image
- Can completely block the underlying image
8. Go Grayscale
Alright, this is more of altering the image than the text. But we can still use it to achieve what we want.
By using a grayscale image.
However, remember that greyscale includes colors from the brightest white to the darkest black. These alone, are on the polar ends of vibrancy. Hence you might want to consider toning down the image first. You can do so via a mix and match with any other techniques mentioned here.
For example, here’s a grayscale image with text at the bottom. However, by default this wouldn’t look good. So we add a scrim at the bottom.

Notice how the scrim naturally blends very well with the image. The image is greyscale and our scrim is a black to transparent gradient. Hence the two techniques go hand-in-hand, quite well.
Also, in the previous image, I didn’t use a scrim. Instead I positioned the text on the top-left. This makes it readable as it sits over a less busy part of the image. That brings us to our next technique.
9. Color and positioning
Sometimes, no matter what, the image remains the same. Say, for example, a category page will use a constant header image depicting its category.
In such a situation, you know what image to expect. You can use this information to design your text. This can be the font, size, color or even positioning the text.
Notice the smart positioning of text, away from images. Also, the calm pastel background colors are not distracting. Both work in favor of the text. It remains clear and stands out, despite the background graphic.
TL;DR — Use enough contrast
The state of being strikingly different from something else in close association. — Contrast
Did you notice? All the techniques discussed above are ways to increase text contrast. Contrast is what makes an element appear distinct from one another. There should be high contrast between text and image. It allows text to be readable.
There is also no need to sacrifice image visibility for text. Both can coexist together if we use the right technique. For instance, using a scrim allows text to be readable. At the same time, the image is visible as well.
As a general rule, using greyscale colors work well. Which means, white text against a dark background. Or black (dark grey) text against a light background always works best.
Conclusion
We looked at techniques that make text readable, without sacrificing the background image. Techniques such as the scrim are perfect examples of this. Or, using a color overlay can help reinforce your brand by using its primary color. This is especially useful when the image feels out of place in your design. Moreover, the blur technique is useful as well. But you will have to see if it aligns with your design style.
Remember that good design is thoughtful and knows how to balance aesthetic visuals with usability and clarity.
It is not enough to let people use your app. It must be easy and pleasing to use.
You can even mix and match two techniques. Your imagination is the limit. Color overlay with scrim anyone?
So what do you think about these techniques? Have I missed out anything? Or do you have something to add to this article? Tell me in the comments below.
Suleiman is a UX UI Designer and App Developer who loves creating simple, usable and intuitive experiences for people. He’s currently pursuing his Masters in UX Design at Rutgers, NJ. Check out his portfolio.
Originally published at blog.iamsuleiman.com on April 11, 2017.