You're reading for free via Joseph Russell's Friend Link. Become a member to access the best of Medium.
Member-only story
The 5-pass reduction wireframing: A minimalist UX technique

There’s a very famous quote by a French author and aviator named Antoine de Saint-Exupery. It’s the foundation of the minimalist movement and it goes:
“Perfection is achieved not when there is nothing more to add, but when there is nothing left to take away”.
In my view, this pretty much sums up great UX design too and it forms the basis of my 5-Pass Reduction Wireframing technique.
Wireframing is arguably one of the most important steps in the UX design process. Designing simple and intuitive experiences can be time-consuming. When you work in an agency environment with tight budgets and deadlines to meet, it pays to find efficiencies.
I developed this technique as a way to speed up the UX design process within my own agency, without compromising quality. The technique itself has been reduced and simplified over the years. In its current form, it’ll enable you as a UX designer, to systematically strip your designs down to their simplest and most intuitive forms in the least possible time.
Before we get into what the five passes are, let’s first take a look at setting up your project.

Project Setup
Whether you are using Sketch, Adobe XD, Figma or another design tool, the same basic project setup principles apply. I think the old Abraham Lincoln quote sums it up perfectly. He said “Give me six hours to chop down a tree and I will spend the first four sharpening the axe.” When designing an app or website this means thinking about and preparing the following before you move a pixel:
- Complete your user journey maps and user flows
- Create canvases at the correct resolutions
- Install fonts
- Set up basic materials and styles
- Ensure access to an icon library
- Set up a library of common elements and symbols
Preparing these before you commence design work will save you hours and help keep things neat and consistent right from the start. If you haven’t got time to set up your own elements from scratch, it may help to download a third-party template to get you started.
Next, we’ll go over what each of the 5 passes is and how to execute them.

1. First pass: Quick Foundation
This pass is all about speed. Getting everything from your user journey flows down onto artboards in Sketch, Figma or XD without too much concern for page layout or optimisation. This process assumes you’ve already prepared some high level user journey maps and user flows. If not, you can find out more about simple user journey mapping here.
Getting a basic foundation for your design finished is often the most difficult part of the UX design process. The prospect of having to carefully and thoughtfully layout the contents of sixty or more pages can be daunting for any designer and can lead to procrastination and delays.
For these reasons, I decided to flip the process on its head.
The first pass in my wireframing technique is to get the foundation done rough and fast before you lose motivation.
HOT TIP: It’s a great idea to timebox this phase. Give yourself an almost impossible deadline to force yourself to move through it fast. No more than 5 minutes per page should be a rough goal.
We aren’t looking for perfection here, just a rough base design for every page which you can continue fine-tuning later.
The benefits of getting it done fast are:
- You’ll see more progress, faster
- You’ll remain motivated
- You’ll have more time for the important stuff
Done? Take a break. Have a coffee and celebrate this little win. The first pass is the hardest one. Give yourself a pat on the back and rest up before getting stuck into the next phase.
2. Second pass: Tidy Up
This pass is about cleaning up the rough foundation you created in the previous pass. It’s about fixing UX problems and adding in any pages and features you forgot in the first pass. You might also want to make sure you’ve used Sketch or XD styles systematically, which will save you time down the track.
The result of this pass is usually an increase in the number of pages and potentially to the complexity in some pages. This is fine. We haven’t yet started reduction. In this second pass we just want to make sure nothing important is missing and that everything is in a neat and coherent form.
This point in the process is a good time to check back over the business goals of the project or your Design Success Strategy. Test your design against the requirements and make any necessary changes.
HOT TIP: Work in flows. You may have already set up your artboards according to your user journey maps. If not, now is the time to do it. Setting your artboards up in user journey groups will not only help you to easily navigate around your design but also to see how changes to one page impact the other pages in the user’s journey.
The benefits of the tidy up pass are:
- The design will now be easier to follow
- Nothing important will be missing
- Major UX issues will be resolved
Now is also a good time to link your pages up into a clickable prototype. You can do this directly in Sketch or XD or upload your design to Invision and link it all up there. An interactive prototype will enable you to better test the user experience and prepare you for the next pass.
If you haven’t used prototyping features before, now would be a great time to learn. Personally I prefer the prototyping workflow in XD, but Sketch, Invision or Figma are all perfectly fine too. Just make sure you use one. Being able to click through your designs as a user would, will uncover all kinds of issues and opportunities you just won’t find while the designs are static.
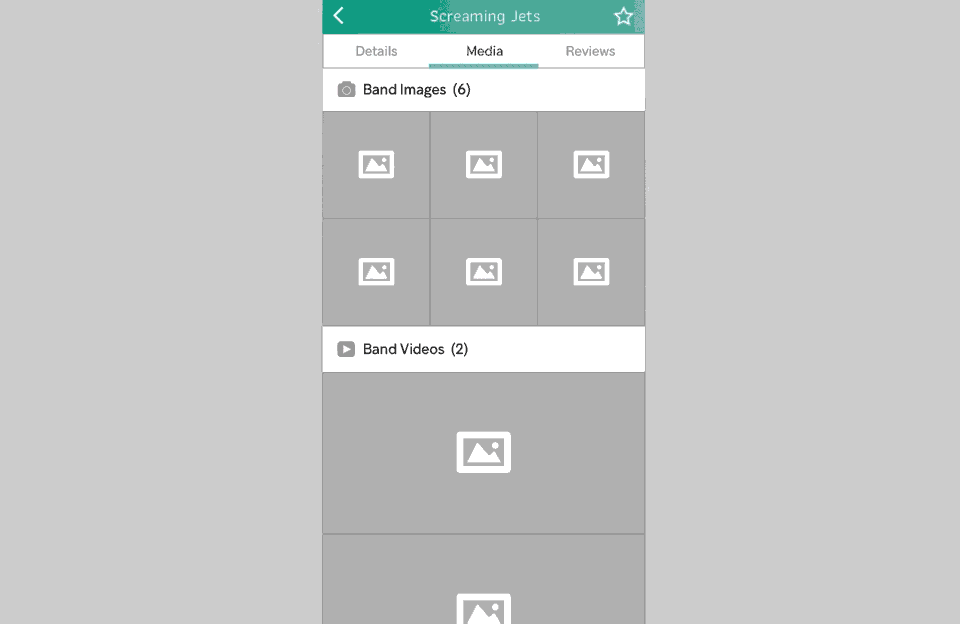
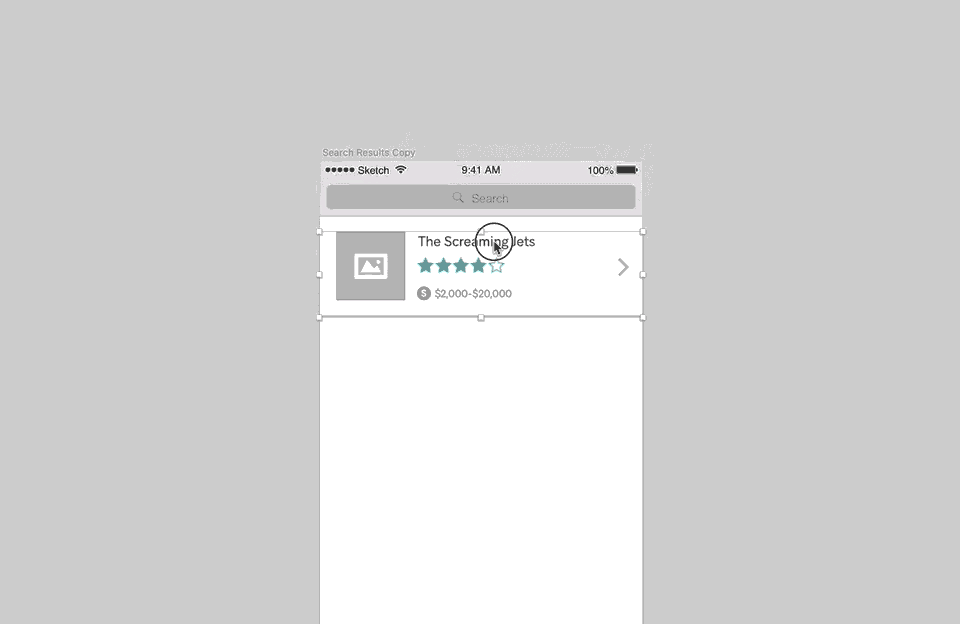
3. Third pass: Reduce Complexity
Now it’s time for the reduction to begin, with a focus in this pass on reducing complexity. We do this by going over each and every screen and flow and identifying any redundancies or unnecessary complexities.
A good starting point is to count the number of steps it takes the user to complete each flow or task and aim to reduce each by one step.
Of course, this may not always be possible but you’ll be surprised by how easy it is to remove steps when you are focused purely on this task.
A few things to be careful of when reducing complexity:
- Make sure by eliminating steps you aren’t increasing the complexity of those that remain. It’s better to have five simple steps than three complex ones.
- Duplicate your artboards before making any dramatic reductions. You may find that the new flow doesn’t work and it’ll pay to have a backup to revert back to.
- Reducing complexity doesn’t mean reducing functionality. Be sure not to remove features in this pass, especially if they’ve already been approved by the client.
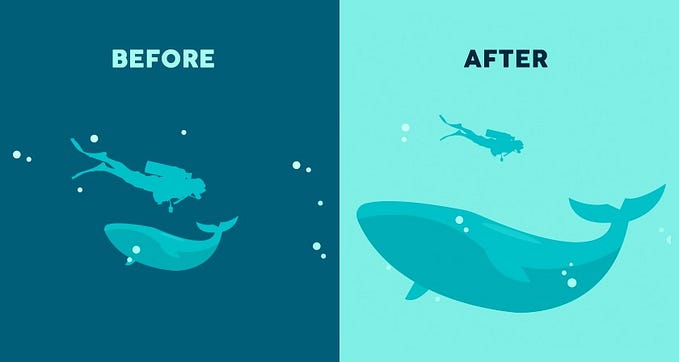
Be brutal with your complexity reduction. Anything that can go should go. Remember, perfection is achieved when there is nothing left to take away.
A few common complexities that you might want to look out for:
- Multiple call-to-actions on the same screen. They can be confusing and slow down the user’s journey.
- Too many instructions and tooltips. This usually indicates an overly complex UX.
- A bit of scrolling can be a good thing because it can help you to declutter the page. A lot of scrolling, however, can indicate you have too much content on the screen and it might be time to break it down into multiple screens. Feeds and list views are an obvious exception to this rule.
4. Fourth pass: Reduce Information
Reducing information and reducing complexity are two very different things. While reducing complexity largely involves eliminating steps to achieve goals and streamlining user flows to make the experience more intuitive, reducing information is all about reducing the amount of content on the page.
You can start with these easy wins:
- Replace text buttons with icons where possible and only if their function is still obvious
- Cut back and abbreviate long headers, labels and instructional text
- Consider whether instructional text is even required. In many cases the previous step of reducing complexity will make the design more intuitive and eliminate the need for instructions.
Something to be careful of during this phase is not to make your design less intuitive by removing information. Some information is crucial in order for the user to know how to use the app. Removing headers and labels for instance, can actually result in the user spending more time than necessary figuring out what each page and element is about.
Like pretty much everything in life, it’s all about finding the perfect balance.
2018 Apple Design Award winning app iTranslate Converse is a great example of information reduction. It has an extreme minimalist interface but even without labels and instructions it still seems very intuitive and just works.
5. Fifth pass: Reduce Complexity
Yes, this pass is a double up. Just like the third pass, the fifth pass is about reducing complexity, again. You might wonder if this step is really necessary and the answer is, it depends. It depends how effectively you were able to reduce complexity in the third pass and whether the fourth pass introduced any new opportunities for complexity reduction.
I find that the reduction of information in the previous pass usually uncovers at least a couple of new potential optimisations and they often end up being the most important iteration decisions of the entire design process.
Here are some things to look out for:
- Can the menus or navigation structure be simplified now that there is less information being displayed?
- Can any related information that was previously being split up, now be merged due to the reduction of information?
- Does the current page structure still work now that information has been reduced?
The improvements you make here are not going to come quite as easily as they did in the previous two passes. This is the final pass and your final opportunity to make any last-minute tweaks. Don’t force yourself to make changes for the sake of making changes but do consider all options carefully. Click through your prototype a few times and make sure everything feels right before moving on.
UX design is all about removing barriers and getting the user to their chosen destination quickly and efficiently. Minimalism and UX perfection seem to go hand in hand. With a bit of preparation and some practice, this UX wireframing technique will save you time while ensuring your designs are as simple and intuitive as they can be. When you’re done, there should be nothing left to take away.
Originally published at https://dreamwalk.com.au on October 25, 2020.