The ultimate guide to recording mobile user tests — a UX epic

At the Pillar Project, I wanted to build a first-class usability lab, without breaking the bank.
After many hours of research, experimentation, and in-field testing, I decided to write up everything I’ve learned. It’s long but should contain the most up-to-date, comprehensive information you can find on the topic — a UX epic!
I hope it saves you time and money.
The elements of mobile usability testing
During mobile usability tests, we essentially want to do three things:
- Record the user’s screen
- Record the user using their phone
- Record their face, body language or any additional information.
This can be surprisingly complicated.

Why you MUST record your user’s actions
This is the most important step. It’s relatively easy to record a phone’s screen, either through Quicktime or Appsee, but then you don’t get to see the user actually using it. Really, you want to record their hands as they use the app. You get so much more information witnessing behaviour, such as:
- Do they tap or swipe?
- Do they find your buttons large enough?
- Where does their thumb go to first?
- Do they hesitate?

UX designers have tried everything from fixing a phone to desks and pointing a camera at it (awkward), to attaching a Go-Pro to the user’s head (really awkward).
The simplest, cheapest and most effective method I’ve found is to attach a webcam to a phone case with cable ties. Some DIY methods look ugly, but if you do it right, this is a lightweight solution, and actually looks pretty sharp. You should have no qualms about handing over a test phone to clients or stakeholders.
Much of the information about building this “sled” was drawn from POKE London’s informative article. They deserve much credit for sharing this method. I’ve updated a few things, however, and my software recommendations are different.
The example below is for an iPhone 6, attaching to a 2018 MacBook Pro (the ones with USB 3 ports). We’ve used similar methods on an iPhone 6 Plus, iPhone 7, iPhone X and several different Android models. If you have an older mac, get the correct cables/adaptors.
Step 1 — Building the Sled
Part List
Prices in GBP, international prices may vary.
HUE HD Webcam
£39.90
https://amzn.to/2KzpcJ0
USB C to USB 3 1m Cable
£4.99
http://amzn.eu/59MTqL6
Black Cable Ties
£2.99
http://amzn.eu/0XHII8Q
iPhone 6 case
£4.95
http://amzn.eu/7AxNjtE
USB C to USB 3 adaptor (3 pack)
£5.91
http://amzn.eu/4ugn8ix
Total = £58.74


The Assembly

- Detach the camera from its base and attach the cable to the extension lead
- Turn the (empty!) case over and lay the cables over the middle of the back
- Mark four holes on the case for threading the cable ties through
- Fire up that drill…
- Make the holes just big enough
- Pull cable ties through, tighten over the connected usb cables
- Clip case to phone and trim the ties.


Step 2 — Set up OBS
If you read older articles on this subject you’ll see various software options recommended, such as Quicktime, Snagit and Security Spy — or maybe some combination of all of them. These have a price tag, create enormous files, and are imperfect for the job.
The good news is that there is now a free and open-source video program that does everything you need. OBS Studio is beloved by Twitch streamers for recording multiple video feeds. It allows you to display several feeds in a window, then record that window. This is perfect for usability testing. It’s also lightweight, powerful and FREE.
It’s awkward to set up, but easy to use after that. I’ll walk you through it.
- Download OBS and install
- Go to Preferences and choose Output
- Choose a Recording Path (I use desktop and sort files later)
- Check Recording Quality is High Quality, Medium File Size
- Change Recording Format to mp4.
Step 3 — Video and Audio Setup
OK, you’ve rigged up your test phone and installed OBS. Attach the usb cable from the camera to the laptop and the charging cable from the iPhone to the laptop (I’ll discuss Android later).
First, authorize the phone and the mac to talk to each other. Popups should appear on both phone and mac. Agree to them. If there are problems, simply disconnecting and reconnecting the cable is the easiest way of getting the right popups to appear. Once mac and phone have recognized each other, load OBS.
- Underneath Sources, click the plus sign to add a Video Capture Device
- Choose “User’s’ iPhone”
- Add another Video Capture Device
- Choose “HUE HD Camera”
- Underneath Sources, click the plus sign to add an Audio Input Capture
- For Audio Input choose USB Microphone (this is the webcam’s microphone).
A standalone microphone is generally unnecessary. The great thing about the webcam is that the user is also holding a microphone near their mouth at all times, even when they’re moving around!
Step 4 — Video Capture Adjustment
- If the webcam feed is upside down, click the image
- Right click to transform the video feed
- Rotate 180°
- Cut the sides to just the phone by holding the option-key and dragging the edges
- Enlarge the video feeds until they fill the screen
- To record, press Start Recording NOT Start Streaming
Three or more video feeds may require careful adjustment, but this is the beauty of OBS. You can keep on adding video feeds and it handles the work brilliantly. The HUE HD webcams are also perfect for this because you can either leave them in their base or detach them and position however you want — I’ve tried taping them to walls to get side-on shots, for example.
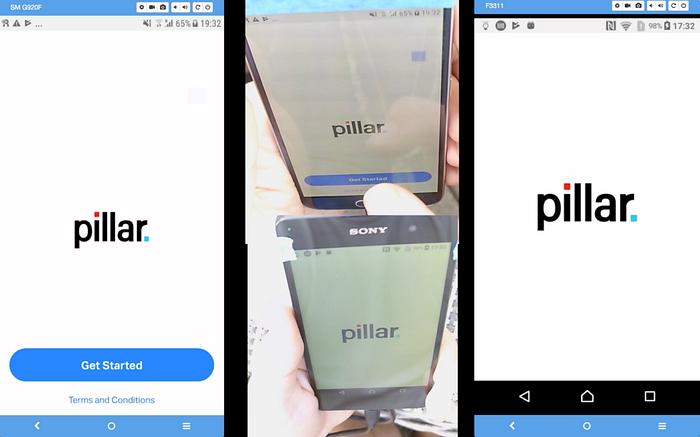
Pointing one camera at the person’s face can be useful, but I find it’s a bit unnecessary unless you’re testing multiple people at once. In our case, the Pillar Wallet is a cryptocurrency wallet with a messaging function, so we sometimes test two users interacting with each other and sending money and messages between their phones.
Using the OBS setup, we can have two users sat on a sofa with test phones, and a third (perhaps even a fourth) camera pointing at both of them monitoring the interaction. This potentially generates SIX video feeds and two audio feeds.
I feel that monitoring all of these is a bit much, but I like having the option. Mix and match and see what works for you.
Step 5— Using Androids
This is a whole separate step.
Macs do not play nicely with Android phones. The best way to mirror an Android is to use Vysor.
- Download and install the Vysor app (not the chrome extension)
- Enable USB debugging (google for instructions — it varies for different phones)
- Connect phone to mac
- In OBS, add Window Capture NOT Video Capture Device
- Select Vysor from the list (you are now monitoring the open Vysor window)
- Pro-tip: For some reason Vysor sometimes lags if the window is not visible. Reduce the size of the OBS window slightly so that the Vysor window is also visible and not hidden behind it. Then it should run fine.
The downside to Vysor is that you have to pay for the premium version, and if you don’t, your user will have adverts play on their phone at some point during the test — not ideal.
The upside is that Vysor doesn’t just mirror the phone, it allows you to control it. This can be useful if your user is really struggling and you want to quickly take over from the comfort of your laptop.

Bonus Step — Running a Testing Session
Some extra tips
Check that EVERYTHING is installed and tested
Phones need sim cards, iPhones need iCloud accounts, Androids need Google accounts, every account needs email addresses, email addresses need authenticating, passwords need saving, and on the list goes… Phones need to be paired with laptops, phones need to be paired with different laptops, systems need to be updated, Vysor premium needs to be registered on each phone, OBS needs to be configured on each laptop, everything needs to be fully charged… If you’re doing this from scratch, make a list of everything that needs to be done, estimate how long it will take you, and then double it. We recently used eight test phones at an event and it took my four-person team almost a full day to have everything fully set up and tested.
Try to have two people conducting the test
Ideally, you want one person interviewing and one person acting as videographer. The interviewer can focus on building rapport and putting the interviewee at ease. The videographer can concentrate on monitoring the feeds and taking notes with timestamps. This will significantly speed up the analysis and synthesis of notes after the interview is over. Having a bunch of quotes with timestamps also makes editing a highlight reel for stakeholders a breeze.
Retest the technical setup as often as possible, especially sound
A dedicated videographer listening through headphones will make this much easier. If you’re doing back-to-back tests, background noise can creep in, cables can become loose, and sometimes you forget to add the microphone…
Have a technical lead nearby for difficult questions by difficult people
Your role as researcher/ux designer is not to explain the product to people. Lapsing into this role can interfere with good interview technique. But with inquisitive, or “difficult”, people, it can help to have someone confidently field these questions so you can keep moving forward with the test.
Complete List of Hardware and Software
Hardware
HUE HD Webcam
£39.90
These things are great. Cheap, lightweight, bendy, good video and sound.
Consider buying several. Multiple cameras will greatly improve your options when recording user tests.
https://amzn.to/2KzpcJ0
USB C to USB 3 1m Cable
£4.99
To connect the camera to the computer. Buy one for each camera.
http://amzn.eu/59MTqL6
Black Cable Ties
£2.99
For securing the camera to the phone case.
http://amzn.eu/0XHII8Q
iPhone 6 case (or other model)
£4.95
Any strong, protective, case will do.
http://amzn.eu/7AxNjtE
USB C to USB 3 adaptor (3 pack)
£5.91
For connecting phones and cameras to laptops. You will always be short of these. Just buy them in 3 packs and thank me later.
http://amzn.eu/4ugn8ix
Software
OBS
Free
For recording the video and audio feeds.
Vysor
Free (basic) or $10/year for premium
For mirroring Android phones to a mac.