Sketch tricks and keyboard shortcuts you might not know about
Exponentially boost your productivity in Sketch with these handy tricks and shortcuts.
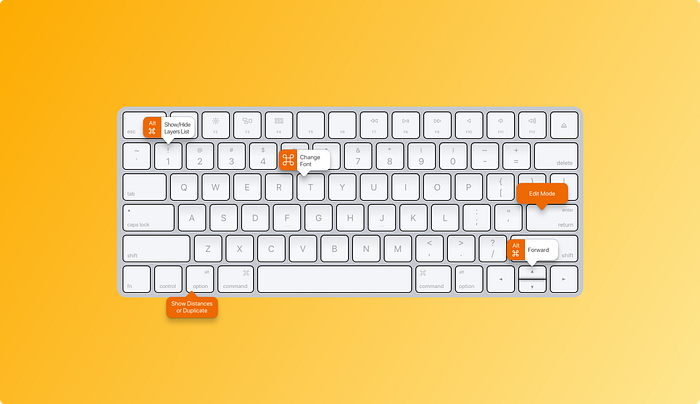
Keyboard shortcuts can play a major role to boost your productivity in Sketch. Since you save a couple of seconds for each action, this starts to compound, saving precious time otherwise wasted on mundane tasks.
Inspector
When working with many pixel densities (1x, 2x, 500w, 200h, etc.), designers need to be able to swiftly convert the units.
Sketch allows you to not only edit the position and size values via the Up (↑) and Down (↓) arrow keys but also using arithmetic operations such as addition, subtraction, multiplication, and division within the Inspector.
Consequently, you can easily convert from, say 1x to 2x, by simply multiplying the numbers by 2.

You can also use percentages. If you were to set the width as 100%, the shape would resize to the full-width of the parent container, be it the Artboard or the group that shape is a part of.

So, to recap, here are the shortcuts packaged with Sketch’s powerful Inspector:
- Math (+, -, *, /) and percentage (%) in fields
- Tab (repeated): Focus on the next field

- ↑ or ↓: Increase/decrease the value by 1px
- Shift + ↑ or ↓: Increase/decrease the value by 10px
- Option (⌥) + ↑ or ↓: Increase/decrease the value by 0.1px
- Drag Left or Right: Increase/decrease the number respectively by hovering over, then dragging the label

Focus using Tab
Selecting a layer and pressing Tab will focus on the first property. As you continue to press Tab while the layer is selected, it’ll keep switching to the next property.
Scale Tool
The Scale tool is one of my favorite and most utilized tools. The shortcut for the Scale tool is Command (⌘)+ K.

Note: The Scale tool isn’t the same as resizing because it scales each property: size, border, shadows, radius, etc.
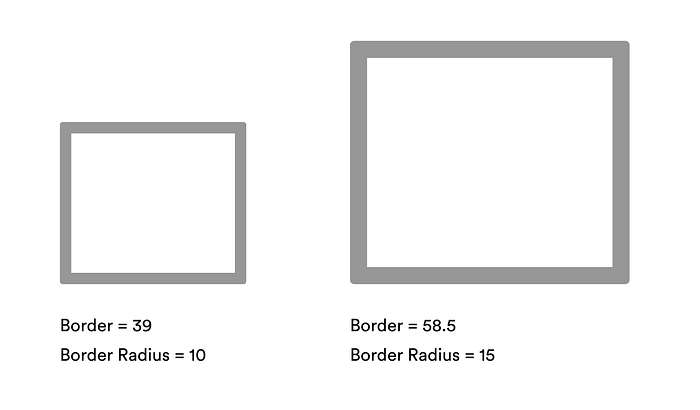
Tip: As a rule of thumb, avoid scaling down since it can lead to decimals in position or size. For example, scaling down a 21 x 21 square will give you a 10.5 x 10.5 square. If you want to retain your pixel perfection, scale-up instead.
Distances
Once you’ve created your elements, you can use the Option (⌥) key to show the distance between these elements.
Select your desired element, and while pressing Option (⌥), hover over elements from which you want to determine the distance.

This is extremely useful because when designing, distances are essential to determine comfortable spacing and consistency.
For instance, if you use 16px between sections of your design, you should also try to keep the same distance everywhere else.
Inserting Shapes
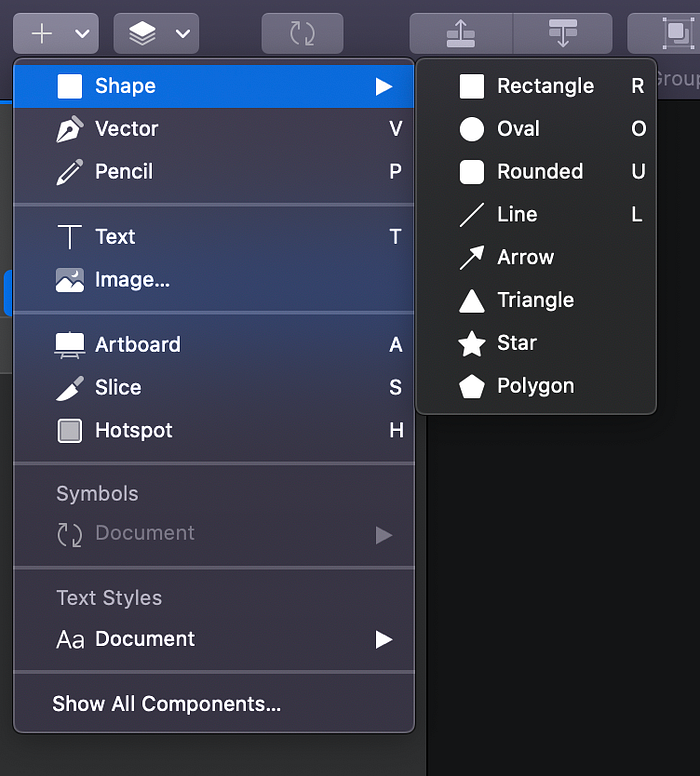
It’s highly likely that you’ll be playing around with shapes hundreds of times daily. With these shortcuts, your experience will be less frustrating and more seamless. Over time, it’ll become a reflex so that you can focus on being creative.
- A: Artboard
- R: Rectangle
- O: Oval
- U: Rounded Rectangle
- L: Line
- T: Text
- V: Vector
- P: Pencil
- S: Slice
- H: Hotspot
You can do cool things by holding these keys while you’re creating your shapes:
- Hold Shift: Maintains the shape’s aspect ratio
- Hold Option (⌥): Draws the shape from the center
As a result, you can hold both Shift + Option (⌥) to draw a shape from the center while also maintaining its aspect ratio:

When you’re resizing a shape, holding Shift will allow you to maintain its aspect ratio. Note that when you’re inserting a shape and hold Shift, Sketch attempts to automatically create a perfect circle or square.

Editing Shapes
If you’ve selected a layer, you can use the following shortcuts to suit your needs:
- 0–1: 0 represents 100% opacity while 1 represents 10%
- F: Toggle Fill
- Control (⌃) + C: Pick a color from anywhere on the page. Sketch’s Eyedropper tool even allows you to pick colors outside the app!
- Double-click or Return (Not grouped): Edit mode
- Double-click (Grouped): Select one level deeper
- Command (⌘) + Click: Select any layer; group agnostic.
- Command (⌘) + Shift + T: Transform
- Command (⌘) + Shift + R: Rotate
- Command (⌘) + Shift + L: Lock/unlock layer
- Command (⌘) + Shift + H: Hide/show layer
- Command (⌘) + Shift + E: Export layer
- Esc: Select parent Artboard or group
- Space + Drag: Move around the canvas
Multiple Shapes
With multiple shapes selected, these shortcuts often come in handy:
- Command (⌘) + Option (⌥) + U: Union
- Command (⌘) + Option (⌥) + I: Intersect
- Command (⌘) + Option (⌥) + S: Subtract
- Command (⌘) + Option (⌥) + D: Difference
- Command (⌘) + Control (⌃) + M: Use as Mask
- Command (⌘) + G: Group
- Command (⌘) + Shift + G: Ungroup
Editing Points
Once in Edit mode, you can leverage several shortcuts to manipulate shapes.

To switch to Edit mode, all you need to do is Double-click the shape or press the Return key with the shape selected.

So, once you’re in Edit mode, here are the shortcuts you can apply:
- 1: Straight
- 2: Mirrored
- 3: Disconnected
- 4: Asymmetric
- Tab: Select the next point (clockwise)
Move and Resize
Distances and Smart Guides in Sketch automatically appear when you drag or resize shapes.
- Option (⌥) + Drag: Duplicate layer
- Command (⌘) + D: If this shortcut is used immediately after Option (⌥) + Drag, the duplicate layers will be spaced consistently

- Shift + Drag: Maintain aspect ratio
- Option (⌥)+ Drag: Resize from center
- Shift + Option (⌥) + Drag: Resize from the center while maintaining aspect ratio
- Command (⌘) + Hover over borders: Rotate
- Option (⌥) + ↑, →, ↓, or ←: Move by 1px
- Shift + ↑, →, ↓, or ←: Move by 10px
- Option (⌥) + Shift + ↑, →, ↓, or ←: Move by 10px while seeing the relative positioning (hover over the target element) of the element
- Command (⌘) + ↓ or →: Expand by 1px
- Command (⌘) + Shift + ↓ or →: Expand by 10px
- Command (⌘) + ↑ or ←: Contract by 1px
- Command (⌘) + Shift + ↑ or ←: Contract by 10px
Text Layers
The following shortcuts apply to text layers.
- Command (⌘) + B: Bold text
- Command (⌘) + I: Italic text
- Command (⌘) + Option (⌥) + “+”: Increase font size by 1px
- Command (⌘) + Option (⌥) + “-”: Decrease font size by 1px
- Command (⌘) + T: Change the typeface
- Command (⌘) + Shift + O: Convert to Outlines
- Command (⌘) + Shift + {: Align text to the left
- Command (⌘) + Shift + |: Align text to the center
- Command (⌘) + Shift + }: Align text to the right
- Command (⌘) + Control (⌃) + Space: Emojis and Symbols
Arrange
You can arrange groups and layers within a parent group or Artboard. Use these handy shortcuts to organize your layers.
- Command (⌘) + ]: Bring forward (this incrementally brings the layer forward)
- Command (⌘) + [: Send backward (this incrementally sends the layer backward)
- Command (⌘) + Option (⌥) + ]: Bring to front (this completely brings the layer to the front)
- Command (⌘) + Option (⌥) + [: Send to back (this completely sends the layer to the back)
Focus and Zoom
You can focus on a particular Artboard or layer using these handy. shortcuts. These bypasses have saved me from a ton of aimless scrolling in Sketch.
- Command (⌘) + 1: Focus on all the elements in the current page
- Command (⌘) + 2: Focus on the selected element
- Command (⌘) + 3: Center focus on the selected element
- Command (⌘) + “+”: Zoom in
- Command (⌘) + “-”: Zoom out
- Command (⌘) + 0: Zoom to actual size (i.e. 100%)
Grids and Rulers
When designing pixel-perfect designs for developer handoff, grids and rulers will become your biggest asset.
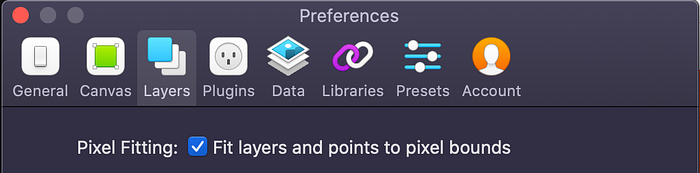
Make sure to enable Pixel Fitting in Preferences (⌘ + “,”) > Layers so that your shapes land accurately in the grid.
If you’re working on a design where it’s important to be able to see individual pixels, select View > Canvas > Show Pixels on Zoom (⌃ + P) to enable Pixel Zoom.
You can then view individual pixels when you zoom in past 100% (the Pixels Grid is only visible at 1000% zoom). This can help determine if your shapes are sharp.

- Control (⌃) + G: Toggle grid.
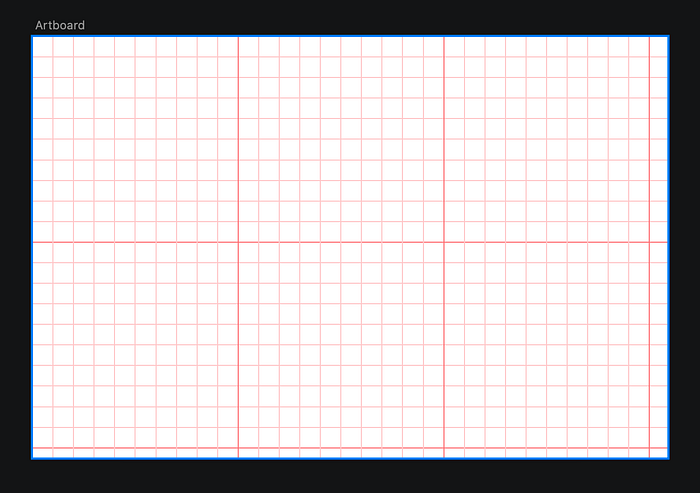
You can only apply grids to Artboards, or to the Canvas if there aren’t any Artboards on it.
- Control (⌃) + G: Toggle rulers
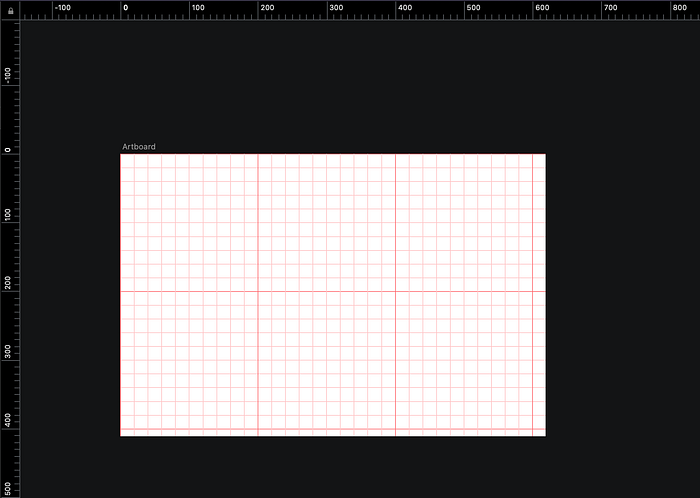
Tip: If you want to create a guide, click in the ruler zone. Then, use Shift to move by 10px. You can drag outside (i.e. toward the Layer List or Inspector) to completely remove the marker.
Click anywhere on a ruler to create a guide. Guides will be visible when your rulers are, and if you move a layer on your Canvas, it’ll snap to the nearest guide.

- Control (⌃) + L: Toggle layout

When you have a layout grid set up, layers will snap to it and ignore Sketch’s Smart Guides.
- Control (⌃) + P: Toggle pixels
- Control (⌃) + X: Toggle pixels grid; only visible at 1000% zoom
Window
- Command (⌘) + “~”: Switch to the next window
- Command (⌘) + Option (⌥) + 1: Toggle the Layer List
- Command (⌘) + Option (⌥) + 2: Toggle the Inspector
- Command (⌘) + Option (⌥) + T: Toggle the Toolbar
- Command (⌘) + “.”: Show/hide Interface; this is useful when you want to go into presentation mode
- Command (⌘) + Control (⌃) + F: Toggle fullscreen
Layers List
The following shortcuts apply to the Layer List:
- Option (⌥): Switch to lock layers instead of hiding; when you hover over a layer while pressing the Option (⌥) key, you have the option of locking it

- Command (⌘) + R or Double-click: Rename a layer
- Command (⌘) + F: Find a layer by its name
- Command (⌘) + Click: Select multiple layers
- Shift + Click: Select multiple grouped layers
- Tab: Select the next layer
- Shift + Tab: Select the previous layer
- Fn + ↓: Next page
- Fn + ↑: Previous page
- Drag and drop outside Sketch: Export 1x PNG asset for your layer, group, or Artboard. You can override the option of exporting bitmaps to a higher resolution by using the Make Exportable option

Custom Shortcuts
Sketch provides its users the option of customizing their shortcuts in the System Preferences pane. To customize your shortcuts, go to System Preferences > Keyboard > Shortcuts > App Shortcuts.
Then, click on the add (+) button. In the pop-up, select Sketch from the Application drop-down and set up your custom shortcut.

Note: Since Sketch does not recognize those commands, you’ll need to specify verbatim what actions you want to perform with custom shortcuts. For instance, to create a symbol in Sketch, the exact name of the menu command is “Create Symbol” that we inputted above.
Here are some custom shortcuts I’ve created and use on a day-to-day basis:
- Command (⌘) + Shift + C: Create Symbol
- Command (⌘) + Shift + M: Make Grid…
- Command (⌘) + Shift + P: Round to Nearest Pixel Edge
- Command (⌘) + “/”: Collapse Artboards and groups
I hope you enjoyed reading this article as much as I enjoyed writing it. Sketch is packed with many awesome features that can supercharge your productivity.
If you’re more interested in becoming a power user, here are a few resources I’d highly recommend:

